One of my favorite ways to screw with my husband is to text things like, “Do we have a crowbar?” Oddly enough, he replies, “Why?” very quickly.
Today I managed to complete my project without needing a crowbar, and honestly I was a little surprised by how easy it was to tear out a doorframe. But the old doorframe had annoyed me ever since we took the door off for our basement stairs to be open. I wanted to do something unique and new here instead, since obviously those hinge holes and the extra moulding don’t look great.
Similar to how I’d created my “live edge” side table, I decided to cut boards with my jigsaw to make surrounding trim that looked like rough, naturally unfinished wood.
Supplies:
(As an advertising affiliate and Amazon Associate, I earn a small commission from qualifying purchases. But it doesn’t cost you anything extra and helps me keep up my site!)
- Eight 1x6x8s (3 for the doorframe, 2 for the front trim, 2 for the back trim, 1 for the front trim, and using the scraps to finish everything for the back and decorative top trim pieces)
- Loctite adhesive
- Wood filler
- Wood stain
- Sandpaper
Tools:
- Multitool cutter
- Utility knife
- Hammer
- Screwdriver
- Miter saw
- Table saw
- Jigsaw
- Nail gun and nails (optional)
- paint brush for stain

Step 1: Tear out the old doorframe. This took me about 10 minutes. I used a utility knife to cut all around the exterior of the trim that surrounded the door. I did this to help loosen the boards from the wall and also to make sure it didn’t pull paint off when I pulled the wood free.
Next, I took a long flathead screwdriver and pushed it behind the trim, then used it to pop the trim off the wall. I did this at the middle, top, and bottom of each side, and this was enough to pull loose the small nails holding the trim in place. I did one side of the door, then the other, and finally took it off at the top.

After removing the trim from the front of the door, I did the same for the backside of the doorframe – the side you see when coming up our stairs.
With the trim all off, this exposed the doorframe’s 2 sides and top piece. I could see the ends of the drywall on either side of the doorframe now, plus a little of the 2x4s that the frame was nailed into. This is where I might have used a crowbar, but the back of a hammer worked just fine. Once the frame’s pieces were detached, I pulled them free and disposed of them.
Now I could see my naked space that needed a new frame.

Step 2: Measure and cut new frame pieces. The 2x4s plus the 2 sides of drywall meant I had slightly over 4.5 inches of width to cover all around the sides and top of the doorway. I started at the top, which was 34 inches across.

So, first, I went into my garage and cut a 1x6x8 board to 34 inches long. I then used my table saw to cut this 6-inch width down to a little over 4.5 inches. (Remember, boards aren’t actually 4 or 6 inches wide when you buy them, so I’d bought boards at the 6-inch width to have some wiggle room, since I knew I’d need them wider than 1x4s.)
Taking this board to my doorway, I held it in place, made sure it covered the ends of the drywall evenly/exactly, and then used a few small nails from my nail gun to secure my board to the top 2×4. You could just use the Loctite adhesive if you don’t have a nail gun.

With this top board in place, that left 81 inches along each side of the doorway. So, I went back in my garage and cut 2 long 1×6 boards to 81 inches each. Then I used my table saw and again cut them down to a little over 4.5 inches wide.
Back inside, I position one side’s board in place – covering the ends of the drywall entirely again – and nailed it into the 2×4 behind it. I nailed at the top, bottom, and one in the middle, and this was plenty to hold it on. Again, you could just use the Loctite if you don’t want to do nails, but they do help hold it immediately.
I then repeated this for the other side.
Main pieces of the doorframe were done!

Step 3: Measure and cut “live edge” side trim pieces. For the trim around this doorframe, I started with the side pieces rather than the top. Again, I wanted them 81 inches long to cover the ends of the doorframe’s side pieces. So, I cut 2 more long 1×6 boards to 81 inches.
As for width, you could make these trim boards however wide you want, really. Since I was using 1×6 boards, I decided to leave them about that wide all the way up. But the trick here is to use a jigsaw and cut a purposefully wavy, NOT straight line all along one side of each side trim board. Just be sure you keep track of which board will be on the left and which will be on the right – you need the straight side of each to line up with the doorframe’s side boards for a smooth, straight corner.
I thought about drawing a line to trace along each board with my jigsaw, but I realized that following the grain lines made the most sense. This helped as a guide and also looked most natural once I was finished cutting. Basically, just cut with a jigsaw along lines nearest the outer side of the board.

I cut my 2 side trim boards this way and then sanded down all my edges really, really well.
Step 4: Adjust baseboards. Once my side boards were ready, I took them to my doorway and stood them near each side. Since the baseboards on either side of the doorway obviously had run all the way to the old door trim, they needed to be shorter in order to fit my new, wider trim pieces. I measured the bottom of my board for the left piece and found it was 4.5 inches wide. So, I measured from the outside edge of my new doorframe to 4.5 inches over the baseboard. Marking with a pencil, I then carefully used my multitool to cut the baseboard at that mark. Once it was cut, I pried the cut section off the wall.

I did this for the right side of the doorway too, and that side was 5 inches.
You could just take off the baseboard entirely, measure for new pieces, and install them in place. Since my doorway has corners close to either side, I didn’t want to deal with cutting and replacing all those angles, so I just used what was there and cut it shorter. 🤷♀️
Step 5: Attach the side trim pieces. With my baseboards now the right size so my trim could fit in place, I lay my first piece on the floor, back side up. I then used Loctite construction adhesive and dabbed it around on this backside of the wood.

With that ready, I lifted the board and set the bottom in place first, then slowly pushed the board tight against the wall, making sure to keep even with the outer edge of the new doorframe. Again, your live edge-looking side of the board should be the farthest side of the board while the straight-cut side is along the inner part of the door.
The Loctite only takes about a minute to hold the board in place, and I added a few nails at the bottom, middle, and top where this trim board stood over the inner frame’s board. This helped create an extra-tight hold on that corner where the boards met.
I repeated this for the other side.
Step 6: Measure and cut top trim piece. I came up with a few different ideas for how to do the top trim. You could easily measure from the outer sides of each side piece, cut your top piece to that length, cut a wavy edge for the very top side, attach it in place, and be done. That would look cool too, and uniform all the way around. OR, you could get a really wide piece of board and make a gigantic burl-looking top piece to go across. There are a lot of cool ways you could cut and shape the top!
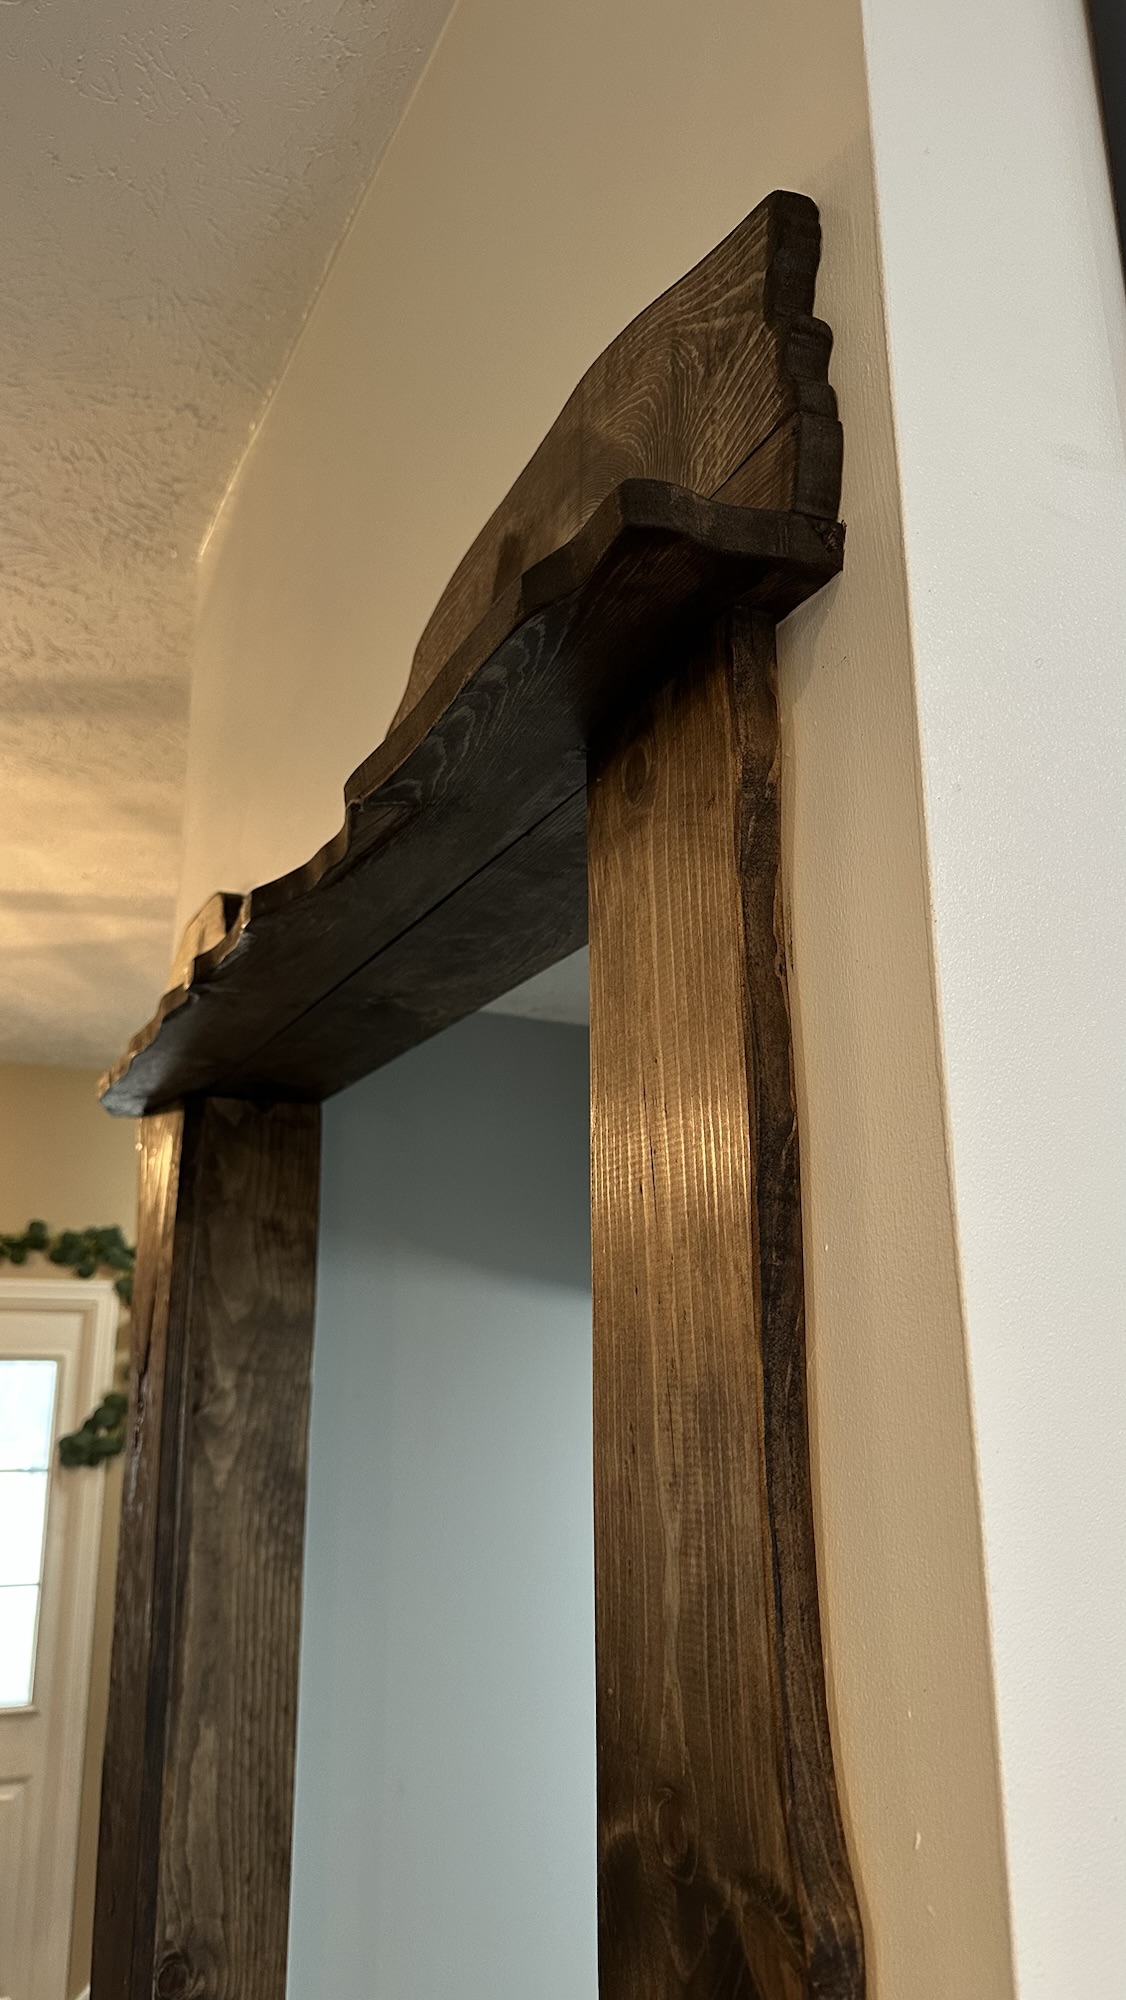
I decided to create a little shelf along the top. I measured the whole way across – from the far side of the trim on the left to the far side of the trim on the right. I then added a few inches so the shelf would be a smidge wider, at 45 inches.
Taking the leftover 1×6 that I’d used to cut the doorframe’s 34-inch top piece, I cut this to 45 inches. I then used my jigsaw to cut a live edge along the board. I sanded that too.
BUT I added an extra cut and used my table saw to cut 1.5 inches along the straight side of that board. This created 2 pieces from my top 45-inch board – one straight at 1.5 inches wide and another at about 3 inch with one straight side and one live edge side. I did this so the shelf wouldn’t stick out very far but still create enough of a space to set picture frames on…or whatever decorations I could come up with later.
I sanded all these edges.

Step 7: Attach the top pieces. First, I dabbed Loctite along the backside of the straight 1.5 inch piece. Then I dabbed the adhesive along the straight edge of the other board – this would become the backside of the shelf.
Climbing on a stool, I held the piece with the live edge so that the live edge faced out and the straight edge (with the adhesive) touched the wall. I made sure to position this board so that an equal amount overhung each end of the side trim pieces that the shelf board sat on. I then used my nail gun and shot a few nails down through this top shelf piece into the tops/ends of either side trim piece.
With that on, I quickly took the 1.5 inch piece and set it evenly on top of the shelf board, tight against the shelf board to help hold it down in place. I used a few nails to help the Loctite hold this board against the wall.

Step 8: (Optional) Add decorative boards to top. Really, you could just use a wider board than that 1.5 inch piece along the top as a support. What I did was use 2 of my scrap pieces to create little live-edge sections for along the top, sitting on that 1.5 inch piece. This just added a little more height to the overall doorframe and a bit more character. I did stain these before attaching them just to be sure I got in all the little nooks I’d cut. Then I put Loctite on the backs and set them in place, holding them against the wall for a minute until they stuck. I didn’t bother with nails.

Step 9: Repeat steps 3-8 for the other side of the doorway. I plan to do something completely different on the inside of our stairwell, but to finish framing your doorway with trim, just repeat these same steps for the other side. If you don’t want a shelf on the other sides, just secure one board along the top, with the straight edge along the doorframe’s top board and the live edge side at the very top. Otherwise, do everything exactly the same as above.
Step 10: Use wood filler. This was a quick step, but it makes a big difference in the final finish to have all you nail holes filled in. I also used it in places where there was a little gap between the boards at the corners.
Be sure to use wood filler that takes stain or paint!
Step 11: Stain or paint. My husband came home in time to provide input, and we agreed to stain the wood in a dark walnut, which is what I’ve used in our nearby kitchen and also our nearby living room. It just ties in nicely. I was worried that the dark stain would hide some of the boards’ character, but the unique knots and such still stand out just fine.

I first put painters tape around the trim, just to be safe. (You could stain or paint the boards before install, but I liked it all being connected first to flow together better.) Once my walls were safe, I used a small brush and stained it all, including the ends and the top of my shelf.
Done!


This has way more character than our old doorframe (with the unused hinge holes and unnecessary moulding) and I really like how it ties in with the wood elsewhere in our house. Plus, the little shelf can be decorated differently for holidays or changing seasons. Now I just need to buy more decorations. 😉
DIY Must-Have Lists


