Earlier this month, I took apart our old outdoor table that was no longer working. I turned part of it into a new shoe rack, but that still left me with a lot of wooden parts to work with…and we still needed some kind of table outside by our bonfire and chairs. S’mores season is upon us, after all!
Since the legs were still good, I decided to take a section of the old tabletop and cut it down to make a smaller table. It’d be small enough to use on our deck with the chairs I’d salvaged, and I’d also be able to easily carry it down to the bonfire area when we wanted it there.

If you have a table with the kind of legs that attach with a bolt and a metal corner piece, you can do this too. (A lot of tables have legs like this.) It’s a great way to make an existing table into a different size, and you can switch out the tabletop entirely while you’re at it.

Supplies:
(As an advertising affiliate and Amazon Associate, I earn a small commission from qualifying purchases. But it doesn’t cost you anything extra and helps me keep up my site!)
- 4 table legs with bolt connectors at the top
- 4 pieces of wood, cut to desired length
- nails, wood glue, or L-brackets and screws
- paint/stain
Tools:
- screwdriver or drill
- miter saw
- small square
Step 1: Choose a tabletop. First, I needed to know how far apart to space the legs, so that meant needing to figure out my tabletop. I decided to make my tabletop slightly rectangular, so I cut down a section of the old tabletop to that shape.
If you’re making a tabletop from scratch, there are all kinds of ways you could do this. You could use a solid piece of wood, make a slatted tabletop like the one I used, or make a circular top. You could maybe even use glass if you had an appropriate adhesive. Get creative!
Step 2: Lay out the legs. With the bottom of the tabletop facing up, I stood my legs in different positions around the edges until I liked how they were spaced. I decided to make the legs stand in a square, giving the longer ends of the rectangular tabletop a little space like an overhang. So, I spaced the legs in a square, each 15 inches apart.

Step 3: Cut wood for the base connectors. I realized that 2x4s would be way too bulky and stick out too far around my legs, so I used a treated piece of 1×6 (treated because my table goes outside) as well as some scrap 1x3s from the original table. I cut the 1×6 down into 2 pieces of 1×3, and then I cut all these 1×3 pieces to the length of 15 inches. For your table, just be sure to choose wood that doesn’t stick out around your legs once it’s in place with the metal connectors. It looks much nicer when everything lines up flush.
Taking my 15-inch pieces, I carefully set them between each of the legs to form my square base on the tabletop. You want to be sure every corner makes a perfectly square 90-degrees, or else the legs won’t line up nicely and it’ll look all wonky.

Step 4: Secure the legs to the wood base pieces. Working with one corner at a time, I put the metal connector on the leg bolt, then loosely put on the nut to hold the metal connector in place so it didn’t fall off. I didn’t want to tighten the nut too much because then it was hard to line up the wood piece – I needed the wiggle room.

Holding the connectors in place, I screwed them onto the wood pieces. I was careful to hold each piece so it didn’t lose its correct position/angle, but they screwed on pretty easily by holding the wood pieces firmly down.
Once I had two wood pieces attached to each leg to make a corner, then I tightened the nuts all the way, making sure everything stayed square. This made each leg sit exactly right against the tabletop so they didn’t wiggle.
I went around to each of my 4 legs and used the metal connectors to fasten the wood pieces together and form the square base, and I tightened each leg in place as I went.

Step 5: Secure the tabletop to the base and legs. At this point, I took my brad nailer and nailed up through the tabletop into the square base as well as into the tops of the legs.
You could also use wood glue.
BUT, if you care about leaving the tabletop looking nice, use little L-brackets positioned along the underside of the tabletop and against the insides of the square base – that would save your tabletop from any nail or screw holes in the top surface. I, however, didn’t take the time and figured this table can look a little rough since it’s just going outside anyway.
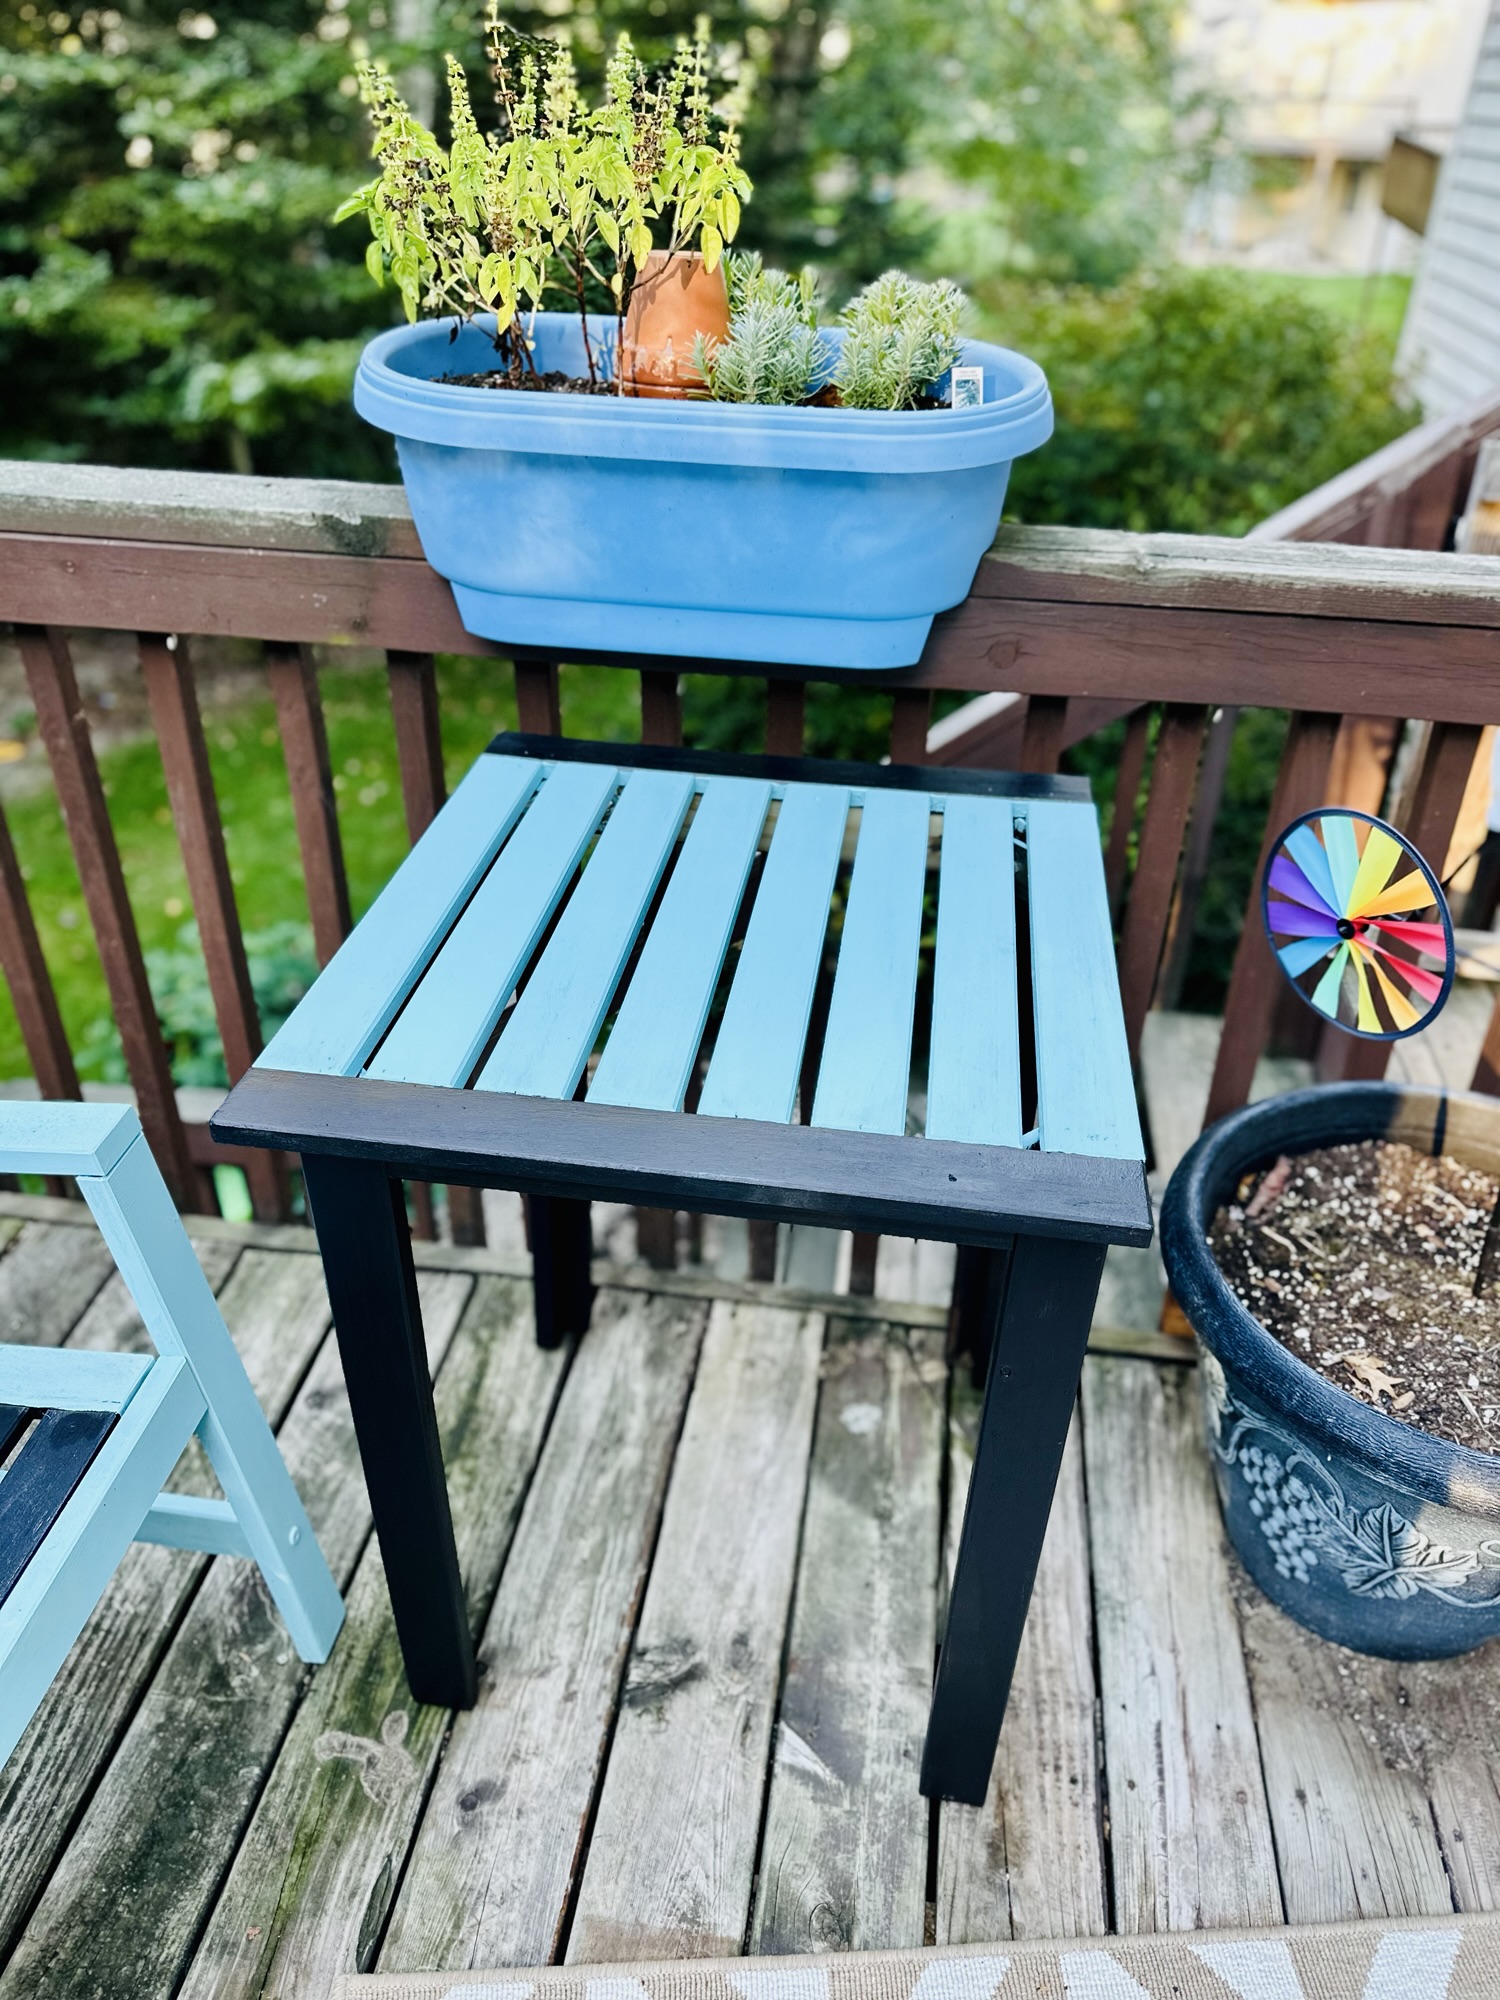
Step 6: Paint/stain. If your legs and table are in rough shape like mine, or if you’re working with different materials and want the whole table to look uniform, now is the time to give your table a quick sanding and either paint or stain it. You could do this in lots of different color combinations/patterns, so again, be creative! I wanted my table to go with the chairs I’d redone earlier, so I used black and the same light blue color, but I switched up which paint went where just for fun…not at all because I forgot what I was doing.

Once dry, it’s done!

I’m quite pleased with how sturdy the table is – the legs sit perfectly flat and don’t wobble. And this certainly is more functional and easier to move around than the old, big table had been.

Now for bonfire nights!
DIY Must-Have Lists


