
Another disclaimer: How well this works and how safe it is depends on the epoxy you use. I use StoneCoat Countertops epoxy for all my epoxy projects (kitchen countertops, bathroom countertops, serving trays, etc.) because it’s easy to use, strong, and has zero VOC (not stinky). If you use something else, be careful to read those instructions thoroughly. But I highly recommend SCC, not only because the epoxy is good but also because they have fantastic online video tutorials.
Supplies:
(As an advertising affiliate and Amazon Associate, I earn a small commission from qualifying purchases. But it doesn’t cost you anything extra and helps me keep up my site!)
Tools:
Foam board?! Yes. It sounds bizarre, I know. When a helpful Lowe’s employee asked what I was working on, she did a double take at my answer. LOL. But after explaining, I think I might’ve convinced her to give it a try in her own fixer-upper. 😂
I’ve explained in “DIY Countertops” how I use epoxy for countertops, but this is a little different. So, here’s how it works.

Step 1: Measure and cut. My aunt and uncle wanted the whole back wall to be one solid slab running all the way up. When I finally got that back wall waterproofed and ready, I measured the space. I did have a built-in bench seat to work around, but that was easy enough to measure for.
The back wall slab ended up needing to be 58×94 with a 15×17 corner cut out on the right side to fit the bench.
Side note: One thing to consider is how big of a slab you’ll be able to fit not only in its final destination but also along the journey there. Do you have room through doorways and around corners into the shower? Do you have a shower curb you’ll have to fit it over? If a full-height (around 8 ft) slab will not fit through those spaces, you can do a shorter slab rather than go all the way to the ceiling, or you could even do 2 narrow panels that can be siliconed together to fill your whole back wall. In a perfect world, you’ll be able to do a full piece like I did, but these are things to check!
With my 2 foam board 4×8 sheets lying on the ground, I measured out my width and height. I only needed an extra 10 inches of width from my second foam board to get my full 58 inches. I needed to take off 2 inches at the tops to get down to my 94 inches. I decided to make that 10-inch wide piece the side of my bench, so I held it in place next to my big piece and cut out the 15×17 corner.

I did all my cutting with a circular saw, but of course the foam is really easy to cut and you could use a utility knife or something else if you are more comfortable with that.

Step 2: Tape the backside and prep. It’s good to have a big area like a garage for this project. I’d already prepared by spreading out a big roll of plastic on the floor and then setting up some sawhorses. One of the most important things when working with epoxy is getting everything level, and I mean LEVEL. Since this garage floor had a drain in the middle, I had to set boards under the sawhorses to make a level floor, but that wasn’t too bad. On top of the sawhorses, I used the rest of my second 4×8 foam board to lay across the middle and then also put boards on either side to help my work surface be level, and these also helped support the foam board slab so it didn’t flex too much where it stretched across the sawhorses.
Now that I knew how big my foam board slab was going to be, I could position all of this so the foam slab would sit on top and be level. I wasn’t too worried about getting it perfectly level at the moment, since for now I placed my foam board pieces upside down on top. With the pieces all lined up, I simply used Gorilla Duct Tape and ran a strip all the way to connect the 2 pieces, then I ran a few small strips across that for added strength.

That done, I flipped the now-one-piece slab over. To make sure the epoxy wouldn’t stick my slab to the supports underneath, I pushed back everything at least a few inches so the top slab overhung the supports – this way, the drips would fall down to the plastic instead.

Step 3: Attach fiberglass mesh, dry fit, and trim (if necessary). At this point, I had everything basically in the position it would need to be in. Now I needed to make the foam board stronger. The first part of this is to attach a fiberglass mesh to the surface of the foam slab.
Before I unrolled my mesh, I quickly dusted off the surface of the foam board slab to clear any debris and/or dirt. Once it was clean, I took the big roll of fiberglass mesh and unrolled enough to start near the bottom edge of the slab. I’ve found that it works best to keep the mesh an inch or so in from the edges – otherwise it’s hard to hide when the epoxy flows thinner over the edges. Making sure the mesh was positioned thusly, I walked along the side and unrolled more and more, careful to keep the mesh smooth and even. If a bump formed, I just lifted the mesh back off and smoothed it out.

At the top end, I cut the mesh so it stopped again an inch or so from the edge. Since my roll was 36 inches wide, I had to apply another strip to finish covering the slab. I went back to the bottom to line up the edges of the mesh as best I could to avoid an obvious seam. I then unrolled the mesh again to the top, cut it, and the went all along the side and trimmed back the extra mesh.

This mesh also helps hold the 2 pieces of foam board together, so I took my cut-off extra and went under the slab to semi-awkwardly 😜attach it to the underside where the taped area ran from bottom to top.
Side note: I will say that the kind of fiberglass mesh you use makes a difference. For my own master bath shower, I’d bought some off Amazon – it’s a PAIN because the adhesive is so strong that you can only unroll a few inches at a time and it tears constantly. The fiberglass mesh I used for this project was right off the StoneCoat Countertops website, and I nearly cried because it was so much easier. 😂
Anyway, with the mesh on and smoothed out, I lifted the whole foam slab and saw immediately that it was stronger and less bendy than before. It was so light that I could carry it by myself through the house and into the bathroom for a test run. Carefully lifting, turning, tilting, and pushing it into position against the back wall of the shower, I found that one little spot was too wide to sit flat against the wall. (Walls are rarely perfectly even, so this is an important thing to check.)
Marking this area lightly with a pencil, I checked the rest of the way around the slab to make sure I had some wiggle room. It’s good to keep in mind that the epoxy will add about 1/8 inch as it covers the slab, so you need at least that much on either side to make sure the final result will fit.
Side note: Since I was doing tile on the side walls of the shower, I knew the tile would help cover the slab’s side edges. That’s the nice thing about doing just a back wall slab. If you’re doing the whole shower surround (which is doable and pretty!), you need to prep your exposed sides/edges better.
With this resizing figured out, I pulled the slab back out of the shower and returned it to the garage. With a multitool blade, I cut off a bit where my pencil marks indicated the slab had been too wide. This just meant little trims along the side, so this didn’t mess up my mesh at all because of the inch I’d left all the way around.
Step 4: LEVEL and Quick Coat. Now was the time to check for perfect level all over the surface of the slab. I also double checked that all my supports were tucked under the slab to avoid sticky drips.
StoneCoat Countertops makes a Quick Coat that works perfectly as a base layer of epoxy. It adds strength to the foam board/fiberglass mesh surface you’ve got so far, and it dries super quickly so you can move on to the next step that same day. You also add a thickening agent that makes it extra strong.
You should definitely read the instructions, but basically I mixed parts B and A, then added a decent amount of the thickening agent and stirred until I got a gooey glue-like consistency.

(Psst. Get a stir paddle like this as a drill attachment. WAY easier for mixing than by hand.)

I had to work very, very fast with this Quick Coat. It was really hot that day, which made it cure even faster than normal. In total, I think I had about 10 minutes to mix, pour, and spread it evenly over the whole surface with my little squeegee. I made it, but my last few wipes with the squeegee were tough!

Once that was on, I left it to dry and went to work on tile or something, but within a few hours it was ready for the next step.
Step 5: Undercoat and guide paint. Typically they say to lightly sand between each coat that you do with epoxy, but I skipped this and everything was fine. 🤷♀️ You next want a nice base coat of color down, like a primer, and I used the SCC white undercoat for this. (You can also get it in black if you’re doing darker colors.) I rolled it on and made sure to cover the whole surface and hide any of the foam’s green color.

I gave the undercoat time to dry and then did a second coat. After that dried, I painted the whole surface in a normal, white, latex paint. Right after that, I took a spray paint that I planned to use in my color coat and sprayed guiding lines to help outline the pattern I wanted to make with the epoxy later.

Then I let this sit. Usually I give this undercoat/paint overnight. However, I started this early in the morning and it had most of the day to sit, so I ended up doing the next epoxy step later that night. (It finally cooled down at 9:00 pm to “only” 75 degrees, so that helped too.) Normally, I’d say give the paint at least 8-10 hours to dry and gas off.
Step 6: Color coat. Much of this step is the same as how I do countertops. Before I do anything with the epoxy, I prepare all the different colorants I’m going to use. There are hundreds of colors and additives to use with epoxy, but for this project I used a white epoxy dye, pearl metallic mica powder, titanium mica powder, white metallic mica powder, charcoal spray paint, aluminum spray paint, and white spray paint. Each of these I set by a cup, ready to go once my epoxy was mixed. (Plastic cups work great as a cheap option, btw.)
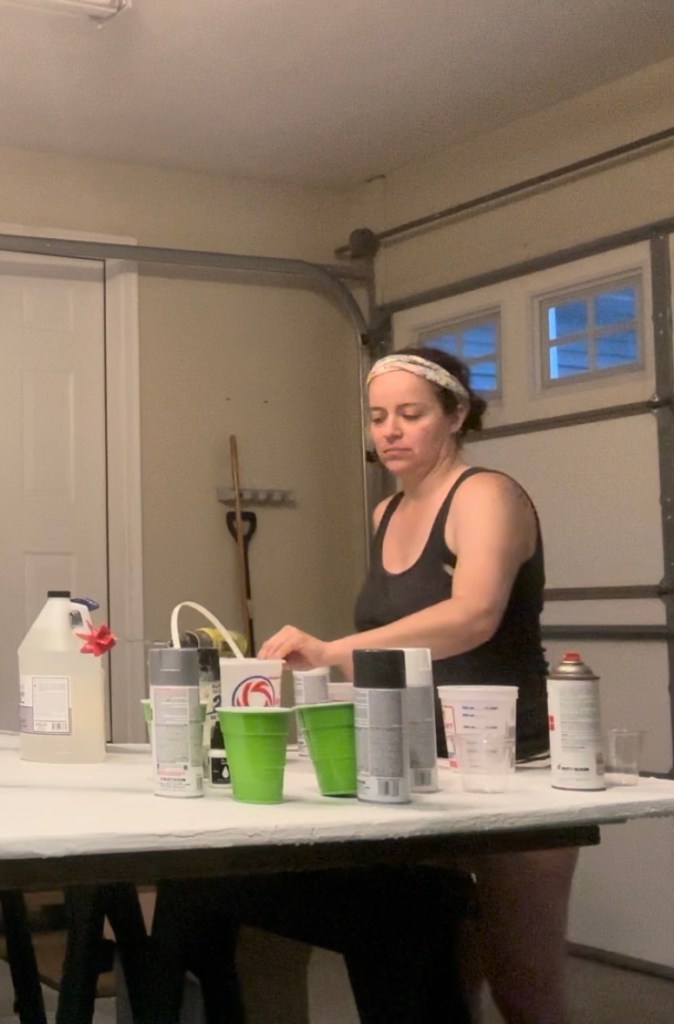
With cheap latex gloves on, I mixed parts B and A of the epoxy in a measuring bucket. (Again, read the epoxy instructions.) I used 128 oz, which worked out to be about 3 oz per square foot. After mixing for 3-4 minutes, I was sure it was well-mixed and at the consistency I recognize to be 👍. Then it was time to pour the epoxy into my different cups for colors. Not one to waste, I set the bucket upside down on my slab to drip the leftovers onto the slab while I mixed my colors.
A few tips with the colorants… If you use mica powders, you really need to stir them up so they don’t clump and leave streaks. If you use dye, you only need a little squirt because a little goes a long way to creating opaque color. For the spray paint, I mostly cover the cup with one hand and spray into the cup through my fingers to cut down on the fumes. (Also, if using spray paint in an enclosed area, wear a respirator.) If you want to be gutsy with a “dirty pour” or “exotic pour,” you can mix different colorants by pouring them into the same bucket or cup, stirring or swirling only a little bit between each color, and this makes cool effects when you pour the cup.
Once my colored epoxy cups were ready, I lifted the main bucket off the slab and used my little stirrer to scrape out what was left. Then I set that bucket under my sawhorses to be out of the way. Taking one color cup at a time, I walked around the slab and poured out the cups over the slab, following my spray-painted guide lines from earlier. Once each cup was empty, I set it under the sawhorses out of the way. I did leave one small cup of dye-white epoxy set aside to add white veins/lightening effects later.

Once the colors were on, I used my gloved hand to begin wiping the epoxy back and forth and along my guiding lines. It’s really cool to see how the different colorants mix and react to each other. If you have a hard time getting the epoxy to spread, it helps to heat up the epoxy with a kitchen torch so it flows better.
Once I was sure that I did indeed have enough epoxy on and it was thick enough to manipulate how I wanted, I wiped epoxy along the edges to help the epoxy flow over the sides and coat the edges – it needs a gentle nudge to help it flow.

After I’d spread the epoxy to cover the whole slab, I could see how my pattern was coming together.
Next, I lightly spray painted over large sections with my aluminum color.

Right after that, I used 91% isopropyl alcohol and spritzed from above. This adds a marbling effect that is SO cool and really starts to make the colors look like natural stone. Then I sprayed lightly with my white spray paint to lighten spots. And I spritzed with alcohol again.

Taking my last cup of white that I’d set aside earlier, I started from off the slab and quickly poured small lines across the slab and zig-zagged all over to create lines/veins of stronger white. I didn’t want the look of veins, necessarily, though, so I gently wiped these into my pattern to cross and add layers.

From there, I continued to lighten here, darken there, spritz here, gently wipe there, until I was happy with the whole piece. It’s hard to know when to stop! LOL. But it’s really cool how, the more layering you do, the cooler the effects look. You’ve got about 45 minutes to an hour to work with this color coat, and if you don’t like something, you can wipe it and change the look as you go.


Forcing myself to strip my gloves and walk away, I went to bed around 10:45 that night and let the color coat cure.

Step 7: Touch up. I’d love to say that I do this perfectly every time, but the reality is that sometimes there are spots I’m not happy with the next morning. It was cool how gravity had pulled the colors here and there, adding a more natural touch to my pattern even if I hadn’t intended for it to happen.
However, there were problems, and I’ll explain how I fixed them in case you have similar problems and get discouraged. In one place, the slight gap between my foam boards had created holes where epoxy had flowed down and not leveled out on the surface. I also had 2 mosquitoes get stuck. 😬 And in a few places along the sides, the epoxy wasn’t very thick and so the mesh showed through.

So, I mixed up a cup of epoxy and added some thickener. Then I added a drop of white dye, stirred until opaque, and sprayed paints into the cup, only slightly stirring enough to create swirls and pools of color.
Walking around my slab, I used a small stir stick to dribble the mixture onto my problem areas. With the thickener, the epoxy didn’t run all over and drip off, but instead it sat on my problem areas and covered them nicely. I also spread some of this epoxy and spray painted a few areas on my edges, finishing up with spritzed alcohol to help blend my touch-up areas with the surrounding colors.

Step 8: Clear coat. I gave these touch ups about an hour to sit (completely arbitrarily), and then I mixed up another 128 oz of epoxy. This I left clear, and immediately I dumped it onto the slab. This clear coat is weirdly satisfying to smooth out and spread over the beautiful color coat, and it’s certainly easier by comparison.

Side note: Again, it’s suggested to lightly sand between coats of epoxy. However, I’ve found that whenever I use spray paint, it’s not worth risking the scuff marks. As long as the color coat is very recently cured (just to the point it’s no longer tacky), adding a clear coat without sanding seems to work fine.
But what about my fresh touch-up areas of epoxy that weren’t cured yet? The thickener helped it to not wash away with the clear coat, plus I was extra-careful to blend the clear coat into the touch-up epoxy so that it was level without washing over my touch ups. The touch-up areas had just enough of a head start to hold up, basically.
Once the whole slab was covered, I used my gloved hands to pat it all over the place. This helps to mix the clear epoxy one last time on the surface and also helps it self-level. Some people like to use a chop brush that you pat all over the place, but that’s a lot of work on a 40 square foot slab. 😜 There’s also the issue of potentially losing bristles that get stuck in your epoxy! And really, I just like the feel of doing it with my own hands because I think it gives you more control. Just like with the color coat, it’s good to wipe epoxy over the edges to help it flow over the sides too, and this is a lot easier when cupping your hand and running it along the sides.

All this patting leaves a lot of bubbles in the epoxy. While the epoxy settled for the next half hour or so, I walked around and around the slab with my little kitchen torch and blew out the bubbles. It takes a while. The first pass might lead you to believe you got them all, but then the light hits from a different angle and you see more! Then around you go again. 😜 But it is important to get out all the bubbles you can, or else they’ll harden and be there forever.

For the next hour, I went back every 20 minutes and checked for bubbles. After an hour, I’ve found that usually no more bubbles will form.

I let this sit overnight. It’s amazing how this clear coat adds dimension to the color coat, so it’s worth the hassle. It also adds strength to your slab by adding a second coat, so again, worth it.

Step 9: Sand the drips. Once the clear coat was dry the next morning, I used a small sander and sanded down the drips on the undersides of the slab. You want to remove these not only for looks but also because they’ll be in the way when the slab needs to press against the wall. It’s easy enough, but an important step.

Step 10: Install the slab! When the clear coat was cured to the point that fingerprints didn’t show if I pressed, it was time to hang the slab. First, I went into the bathroom and applied dabs of 100% silicone to the back wall. I used pretty much a whole tube of the stuff via a caulk gun, squeezing out dabs all over the interior parts and tracing an outline all around the sides, top, and bottom.
Then it was time to, as quickly as possible, bring in the slab. While certainly lighter than a stone slab, this foam/epoxy slab is still awkward to move, so it’s best to get another person to help. My uncle and I carried it inside, and I copied how I’d moved it earlier during the dry fit test run.
The slab will still bend a bit, so be careful not to crack it! But honestly, I have yet to damage one during install (knock on wood), and I’ve been pretty rough while shoving them in place. This time, I held it against the back wall and gently pushed it all over to stick the back into the silicone.
Once the whole thing was pressed on, I was glad to see that it stayed in place. Sometimes you may need to carefully brace the slab in place until the adhesive dries. (I had to do this with my basement bathroom slab due to…less than perfectly plumb walls.)
With the slab on, I took this time to shift gears and finish the tile, admiring the slab whenever I needed a grouting break. 🤣

Optional Step 11: Apply a top coat. I say this is optional because there are a few different ways to finish the slab.
Option 1) You can stop now. The clear coat will fully cure in 30 days and have a glass-like finish. It’s beautiful, but it’s not as protected as if you applied a top coat. And it’ll show fingerprints and water droplets much the way glass does, which means more cleaning. This is the way I’m planning to finish my basement bathroom shower…which is still a work in progress, as seen below. Since this shower won’t be used daily, I’m less worried about cleaning and maintaining this one, so a glass-like finish hopefully will be fine.

Option 2) You can apply StoneCoat Countertops’ glossy version of their Ultimate Top Coat. This rolls on as a very, very thin layer kind of like a coat of polyurethane. It has a glossy finish that is still pretty but knocks everything a little flat as opposed to the dimension of the plain clear coat. A big benefit is that this is much easier to clean and has a slight texture that prevents fingerprints.
Option 3) There’s also a matte version of the Ultimate Top Coat. This works great for more “natural” looking stone designs where you don’t want shine, such as soapstone (like what I did in my master bathroom below). Like the glossy version, it adds a lot of protection, but it will knock out any shine and flatten the dimension of your design.

Option 4) You can sand with a really fine grit and “hone” the epoxy like stone. But I’ve never done this, so I can’t give any real tips here.
For my aunt’s shower, we went the glossy UTC route because they wanted shine but easier cleaning. So, once the slab was on, I mixed up the glossy Ultimate Top Coat and followed the instructions (and YouTube tutorials) to roll it on. I did this with the slab already hung because it was a lot easier to move quickly over the whole surface this way rather than trying to reach everywhere from around the slab with it lying down.
Side note: This top coat is hard to get right, so be sure to watch some SCC videos of how to do it before winging it yourself.
Done! The next day, the top coat was dry, and my work with the shower slab was done! Again, it takes 30 days for a full cure, but because of the Ultimate Top Coat, my aunt and uncle only needed to wait a few days (48 hours is generally recommended) before using the shower. If you don’t use a top coat, it’s recommended to wait 7 days for light use. Still, it looks worth the short wait to me!

So is it worth the effort? This shower slab covers about 40 square feet and cost roughly $500. To tile like the rest of the shower, it would’ve been a little over $700. For a real solid slab, I’m told it’s anywhere from $900-$5,200 before the cost of labor. So for me, that’s a solid 👍, especially since I can color it however I want to match the rest of my bathroom.
Another valid concern is whether this foam-based shower slab will hold up. If you do the fiberglass mesh and the multiple layers of epoxy, these slab surfaces are STRONG once fully cured. The Ultimate Top Coat also protects extremely well from scratches. My master bathroom shower is used daily, and we fall/lean into the walls all the time and juggle/drop bottles without causing any dents or scratches.
Personally, I think these slabs are a great way to add a wow factor without breaking the bank, and they’re a creative alternative to tile or a real slab. 🤷♀️ Plus, they’re certainly easier to clean than rows and rows of grout!
DIY Must-Have Lists


