
My plan was simple…ish. I found a tile I loved but didn’t have the $$ for on TileBar, and fortunately they have very inexpensive samples you can order. These samples became my templates. I knew how much joint compound I would need for my bathroom walls from when I’d textured the walls of our basement’s main room – about 3 gallons. And, I had leftover paint from that main room and also the guest room – one paint for the “tiles” and one paint for the “grout.” Finally, to give the “tiles” the finish I wanted, I’d use some high-gloss polyurethane to add a bit of shine and also fully seal everything.
So, with the drywall patched up and seams decently covered (albeit somewhat lazily because I knew I’d be hiding it all), it was time to make my walls look tiled.

Step 1: Spread joint compound. Knowing I’d need some time for this, I opted not to get the quick-drying kind of joint compound. That kind had worked fine for my faux-bricks in the main room, but making my tile shapes was going to take a little longer than simply rolling with a brick-pattern roller.
Supplies:
(As an advertising affiliate and Amazon Associate, I earn a small commission from qualifying purchases. But it doesn’t cost you anything extra and helps me keep up my site!)
- Tile samples/templates
- Joint compound
- paint for tiles and paint for grout
- polyurethane
Using a 6-inch spreader, I covered one wall at a time. I spread the joint compound thick enough that my “grout lines” would give the illusion of decently thick tiles, about 1/8 to 1/4 inch or so. I made sure to spread the compound as smooth as I could, but I left some rough texturing because I wanted rustic-looking tile. If you’re aiming for fancier, less rustic tile, obviously try to get the joint compound as smooth as you can. I also knew I could sand off any really rough bits, so that helps too.

Step 2: Trace your tile templates. I tried different tools to do this, but I ended up liking my finger best for the job. I wanted my rows of tiles to be as level as I could get them, so I started at the very bottom of my wall. Holding my tile in place just off the joint compound, I was careful not to get it in the mud. Then, I simply ran my finger around the edges of the tile to create my “tile” in the joint compound. With that first one done, I held up the alternating shape and lined up the edge to fit against my first tile’s edge – like they shared a grout line. Then I traced that tile with my finger.
I repeated this for that whole bottom row of tile. When it was time to do the next row over that, I again lined up the edges to share grout lines. After a while, I only needed to use one of my tile template shapes because I could kind of checkerboard how I positioned the template, and it still gave me the other shape because of where the edges lined up. At the top of my wall, I had to finish with only the bottom parts of my “tiles” to make it look like my tiles were cut to fit against the ceiling.

It’s worth noting that, after a while, it was a good idea to rinse off my tile templates to get rid of the joint compound building up on the edges from my finger’s tracing. This also helped to keep globs from falling off onto my wall.
Side note: I also considered finding/making cookie cutter type shapes to push into the joint compound to make my tiles. I couldn’t find the exact size or shapes I wanted, but that’s an option if you can find or make the shapes! That way, you wouldn’t have to trace but rather just kind of stamp tiles instead.
Anyway, this tracing took some patience, but I soon saw how it was coming together! Once I had one wall traced, I spread joint compound over my other walls and traced those with tiles too. I tried to line up from the corners to make it look like the tiles wrapped around the room. If a tile had been “cut” into one wall’s corner, I finished that tile on the other corner.

Step 3: Dry and sand. After the joint compound was dry (I gave it overnight), I took a bit of sandpaper and wiped over my walls to knock free any loose chunks of joint compound. For any parts that stuck up too pointy, I sanded these to soften any edges. If some of my tiles were too rustic and rough, I sanded those smooth too.
Joint compound can be quite dusty, so once my sanding was done, I grabbed a broom and gently swept off my walls to get all the dust free from the nooks and crannies.

Step 4: Paint the tiles. Full disclosure, I did this backwards from how I’m telling you to do it. I painted everything the color of my grout lines first, then I went back and did the tiles individually. I did this because I had way more grout-colored paint and wanted a base down rather than risking having to do 2 coats of my tile-color paint but running out. Having done it this way, I can definitely say it would be easier to paint everything the tile color first! That’s a lot more area to cover, so it’s way smarter to roll on the tile color and worry about your grout lines later. Painting individual tiles took FOREVER.
For this base coat (which should be your tile color) I used a small roller, and this helped get in all the little gaps. The joint compound will suck in the paint fast, so keep that in mind if you’ll need a few coats.


Step 5: Paint the grout lines. Even after I painted everything my grout color and then painted my tiles, I still had to go back and repaint my grout lines anyway so it looked more like a real grout job. 🤦♀️ With your tiles all painted, you’ll just have to use a small brush and paint along your traced lines.
I found this went pretty quickly, despite all the lines. With a small brush, I ran paint through all the finger-traced paths and connected them all around the tiles, running the paint up the little sides of the paths to look like grout running between the tiles.
Step 6: Seal with poly. Once the paint was dry, it needed a little something to keep it from just looking like paint. Depending on the tile finish you want, you could use matte poly or satin or gloss. I wanted a little shine to my tiles, especially since this is a dark basement bathroom.
With another small roller, I spread on the poly pretty quickly. I ended up doing 2 coats to get the look and feel I wanted.

Oh. One more thing about the poly! I know everyone on the internet seems very concerned about textured walls attracting dust. But the poly finish helps with that too. I’ve had these walls finished for a while now, and I’ve done a lot more construction/sawing/sanding in the room without dust sticking on the walls at all. 🤷♀️
Done! I really like how these walls look now. The “tiles” add character and interest to the walls, and the texturing is a nice way to make the room feel cozy and earthy. Plus, you can’t tell what a mess the drywall was when I started! 😜


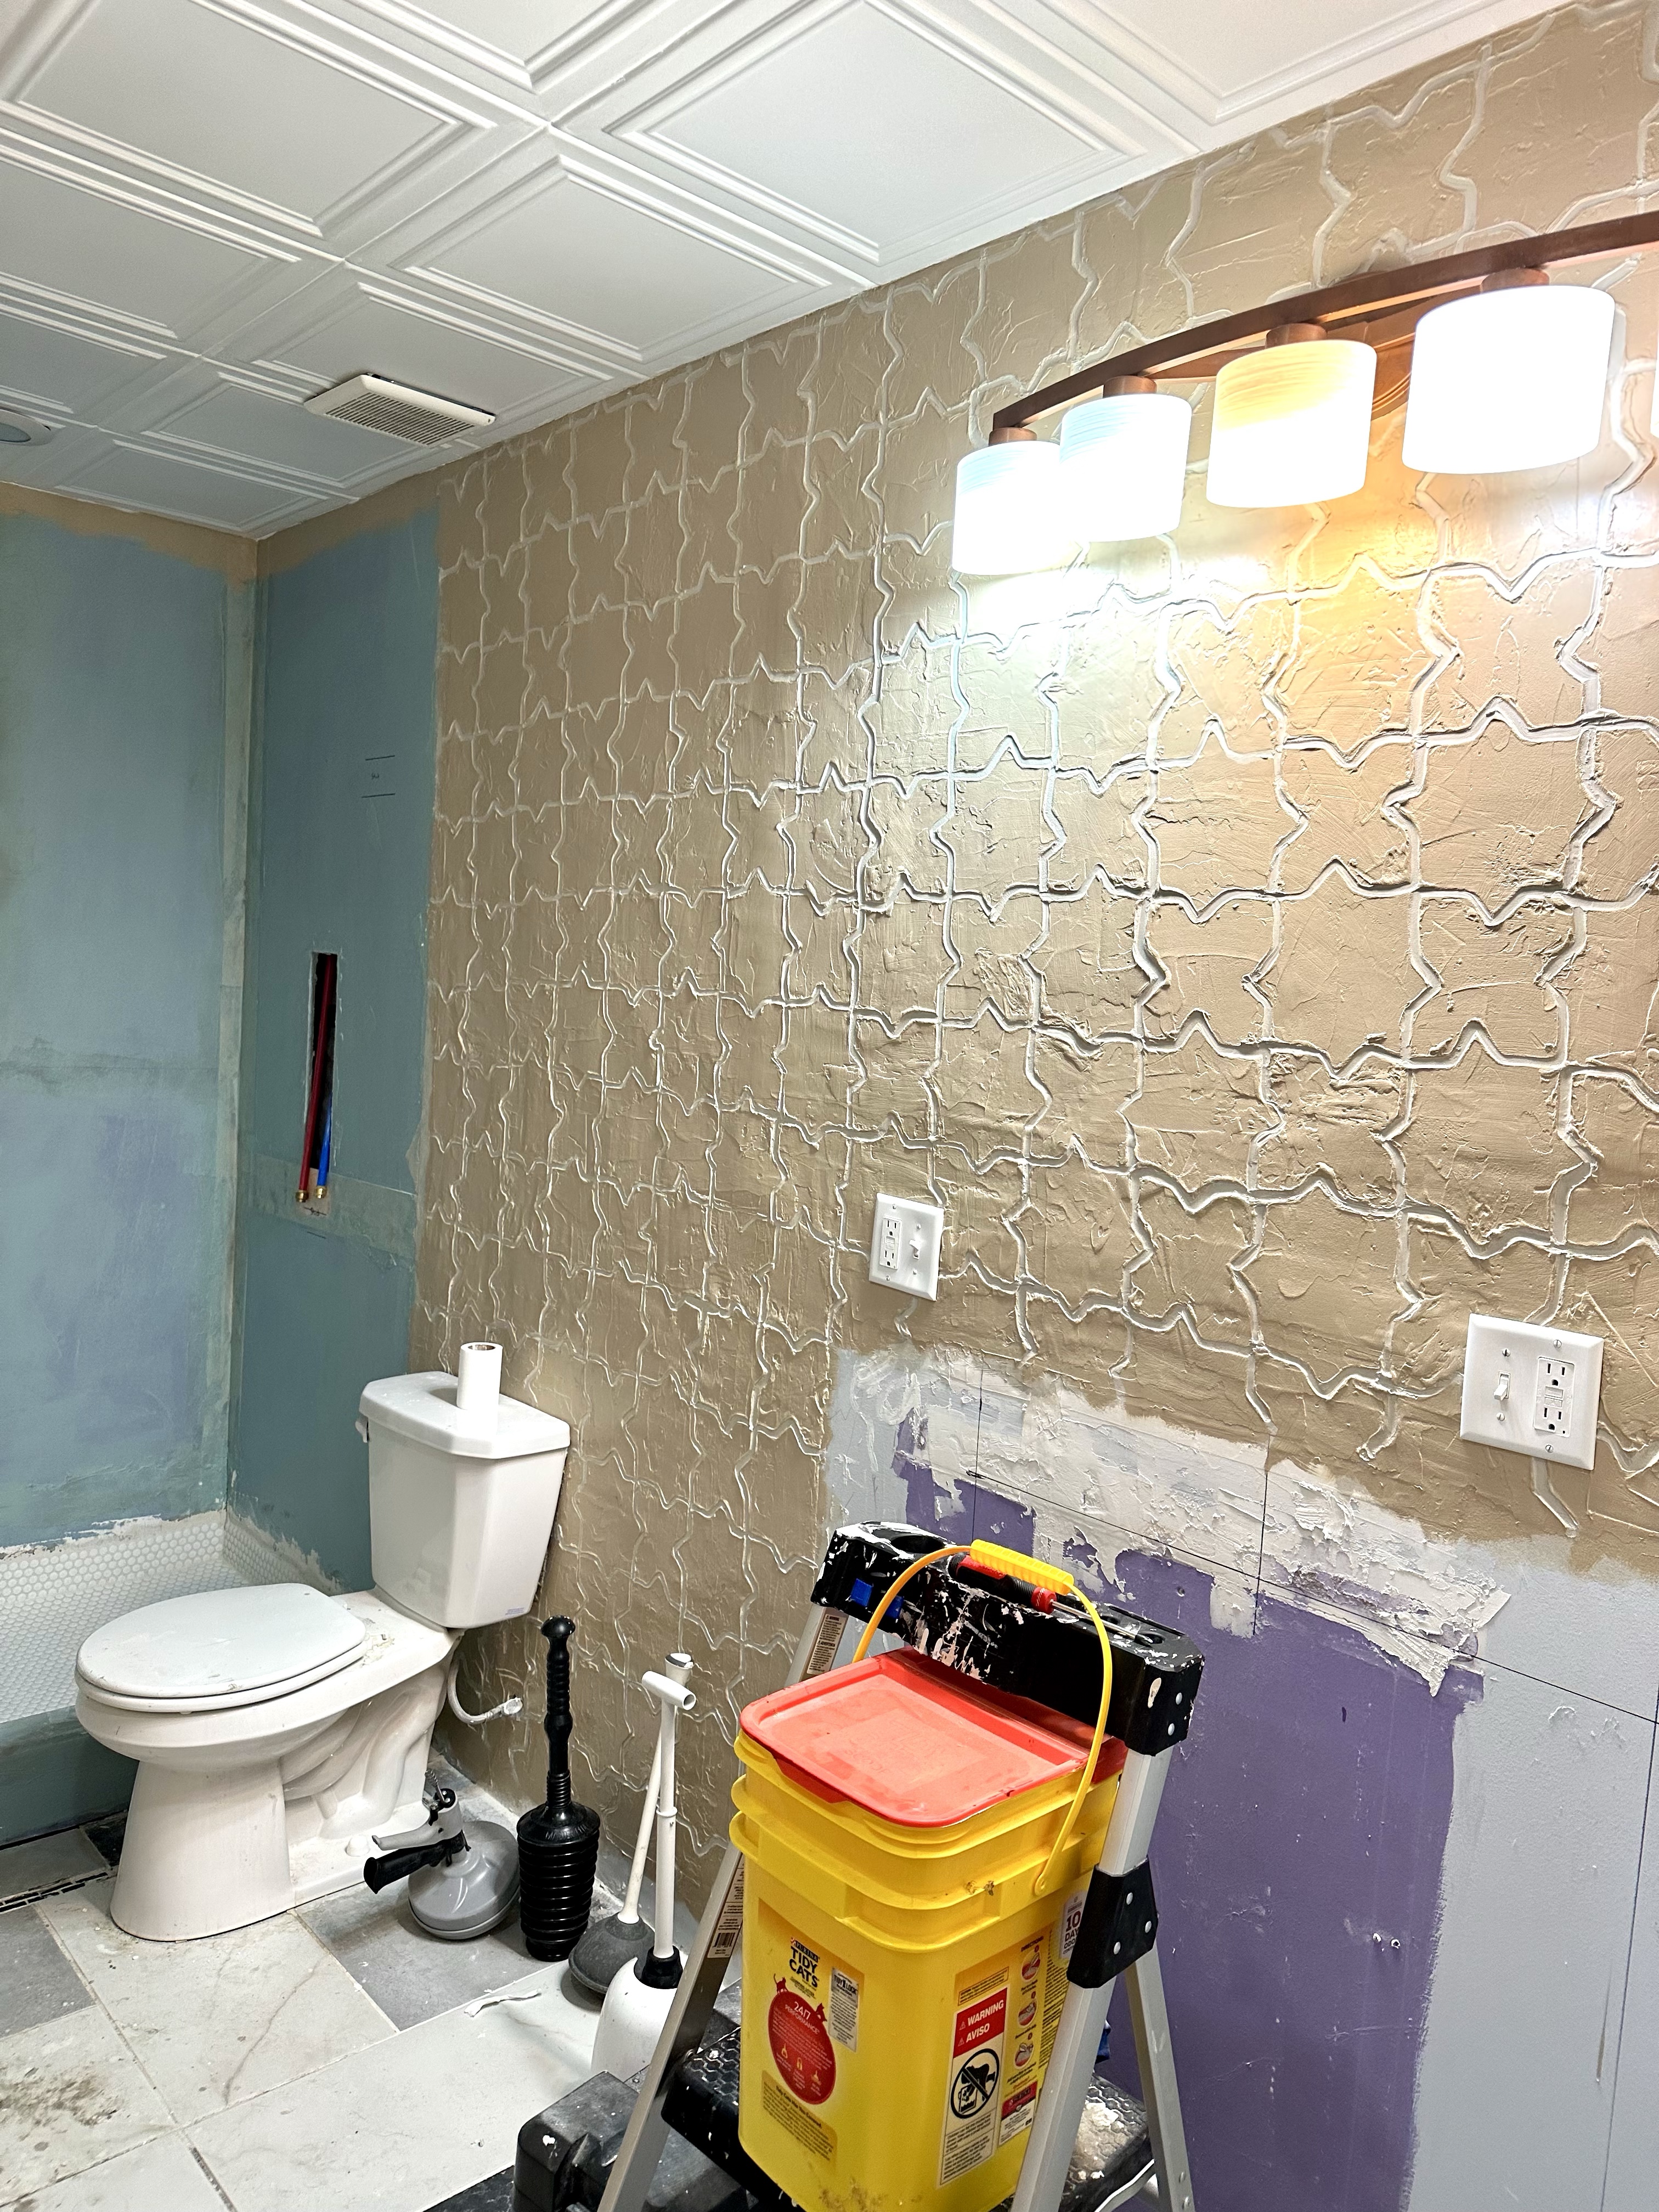
Clearly I have a ways to go with the rest of the bathroom, but the walls were a big step forward. You can see the whole left wall “tiled” in the picture above, as opposed to the first wall where I only textured the walls around where my new vanity will go…assuming I figure out how to build the thing. Wish me luck!🤞
DIY Must-Have Lists


