Posted on Leave a comment

DIY Bulkhead for a Small Basement Space

What a week (plus a day)! My family drove down to Ohio to build a basement guest suite for my husband’s cousin. Was it worth it? Yes, absolutely, because we’ll get to stay there when we visit. 😆

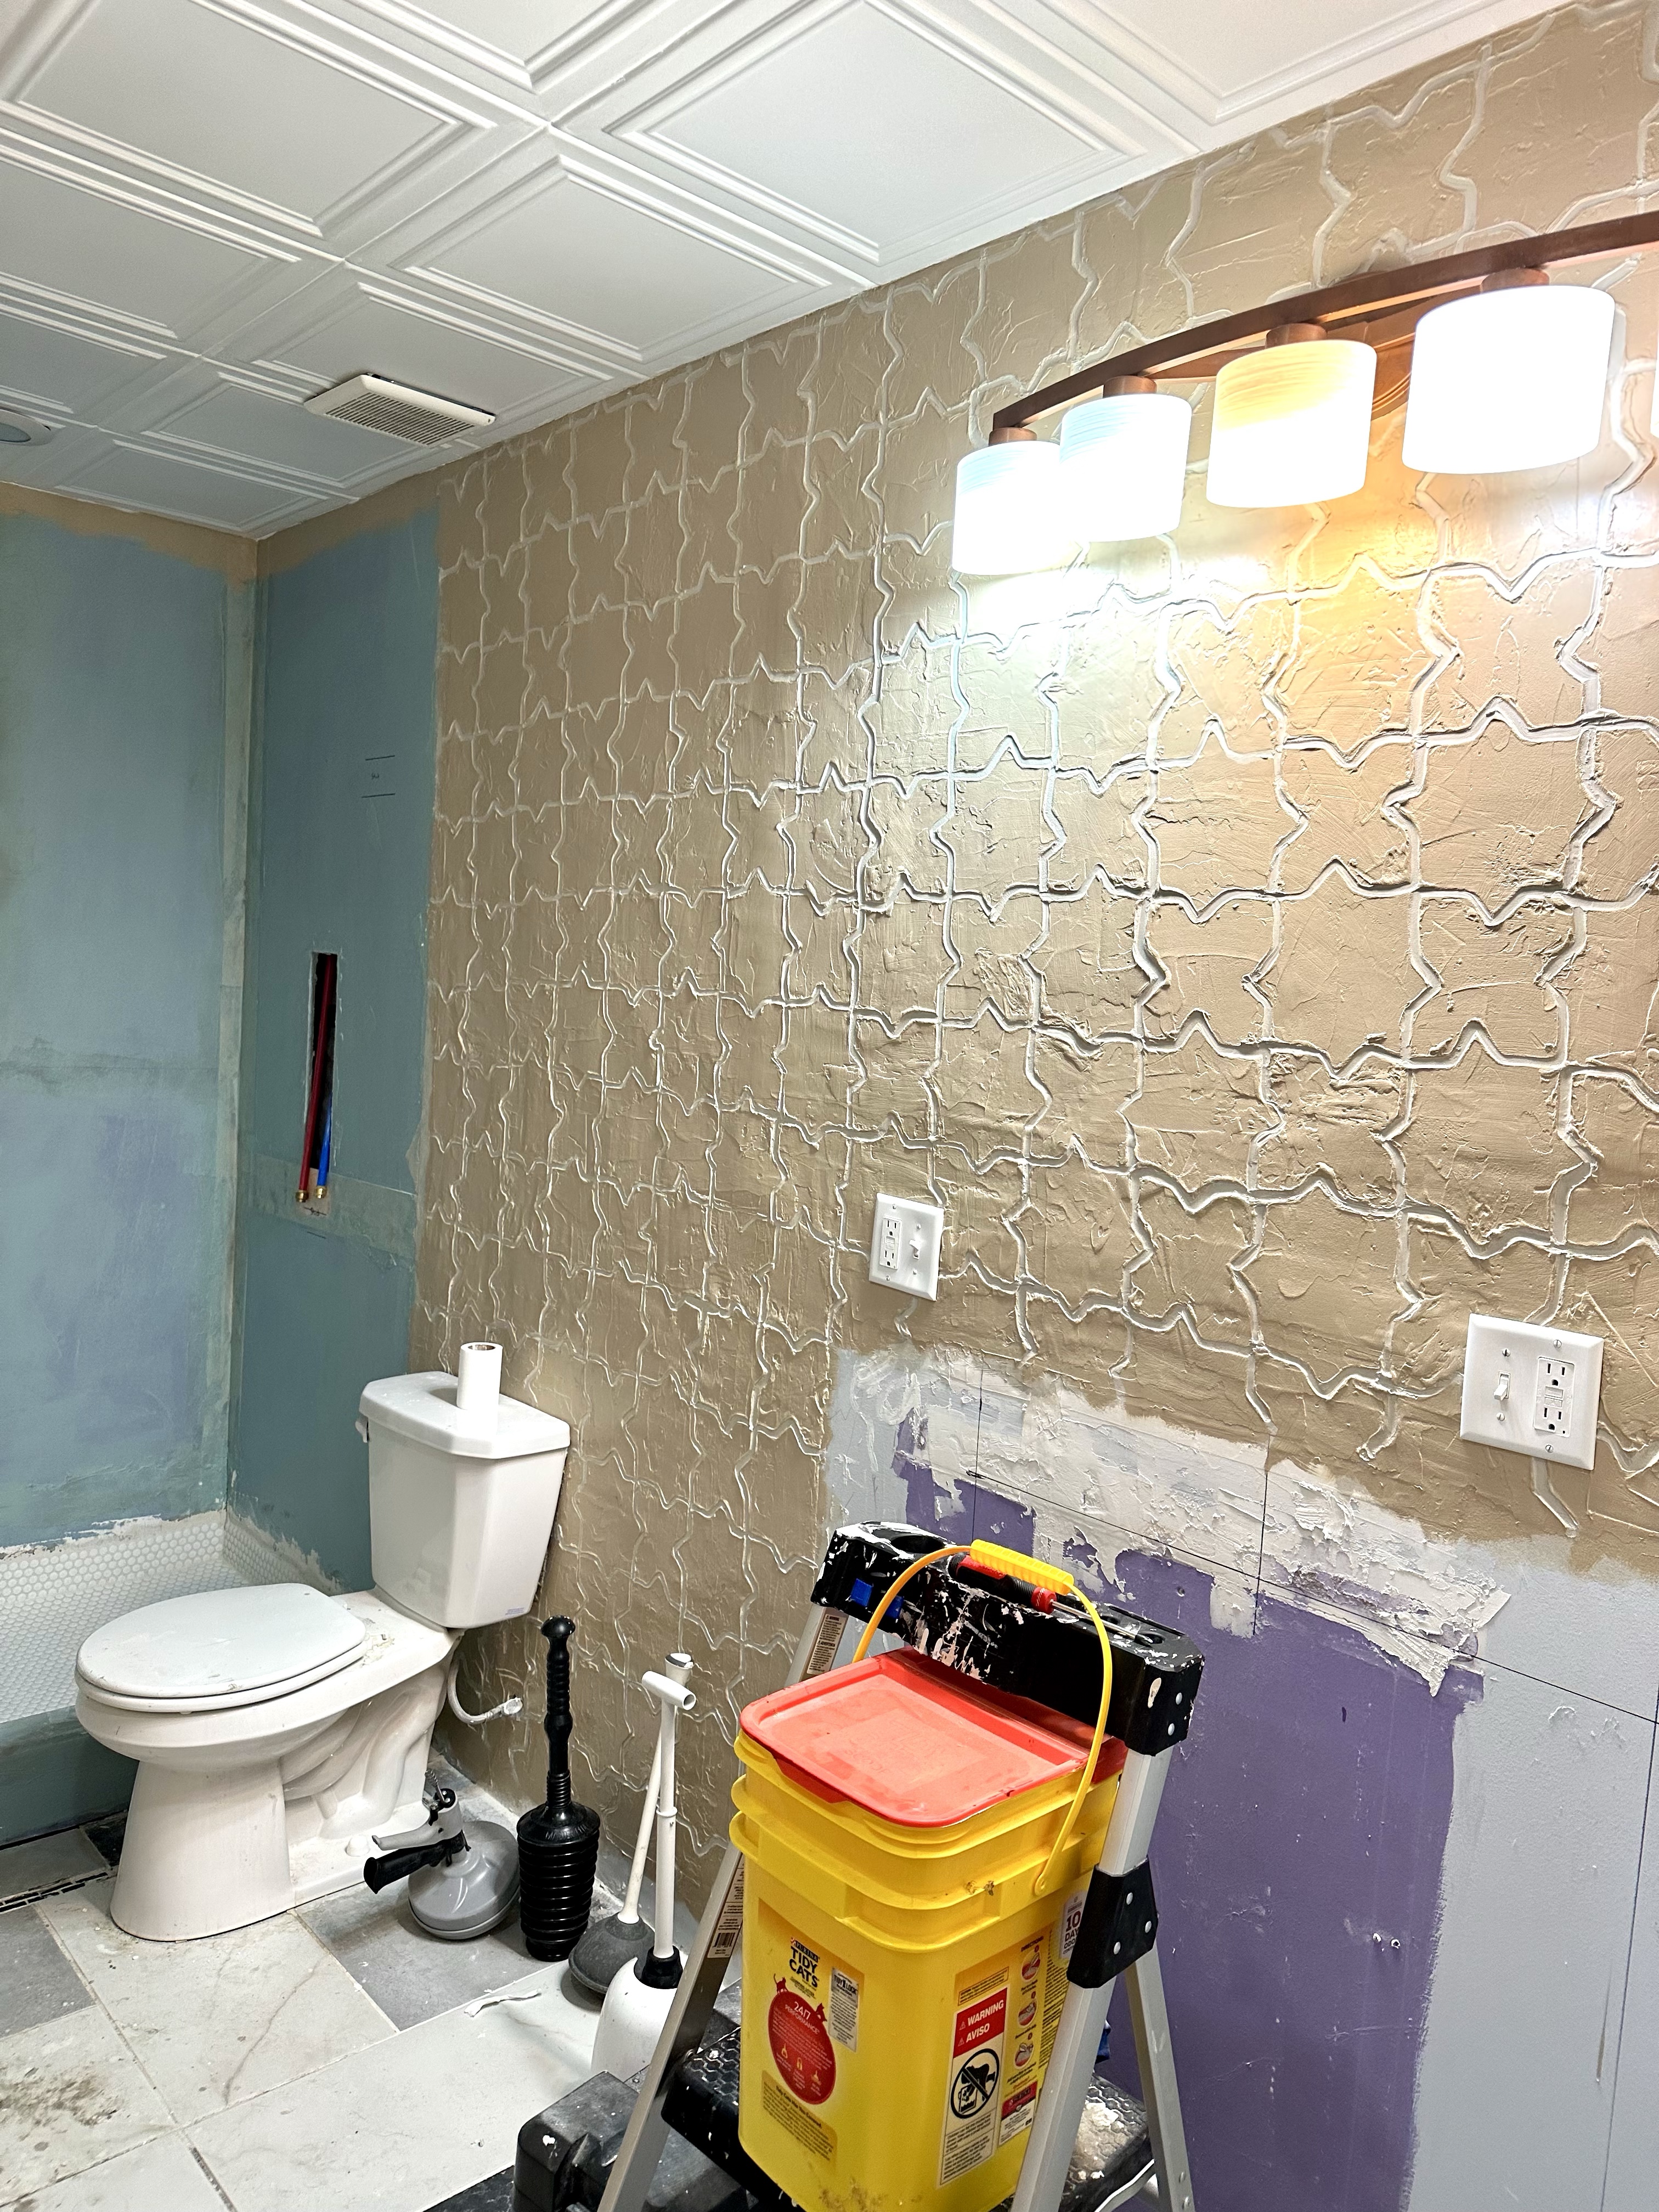
BUT, my biggest challenge was figuring out how to hide a bunch of pipes and wires that hung at an angle across the part of the space that we were making the bedroom. Ordinarily, making a bulkhead might not have been that difficult, but these pipes angled down towards the door so that there was only 3/4 inch between the top of the door and the lowest pipe. And they angled weird across the room, so I didn’t want to just paint them like we did in a section of the bathroom.

BEFORE: Mess of angled pipes and wires.

So. If you’ve got a tight space, here’s how we made our bulkhead!

Supplies:

  • 2x4s (length depends on your space, we used 8 at 8 feet long)
  • 1x3s (we used 4)
  • Construction screws
  • 4×8 drywall sheets, 1/2 inch wide (we used 2)
  • Drywall screws
  • Joint compound
  • Paint

Tools:

  • Drill
  • Tape measure
  • Level
  • T-square
  • Mud spreader
  • Paint rollers/supplies
  • Utility knife

Step 1: Measure. We had to get this exactly right, and I checked measurements constantly. But to start, I decided to judge everything off of the position of the beams. Going from the floor didn’t make any sense, since everything would have to connect from the beams anyway. First, I found that the lowest point where I could possibly go was 13 inches down. That would leave me room for our 1/2 inches drywall – always remember to keep in mind the added width of the drywall!

Tight space!

I then figured out how far from the wall the bulkhead would have to go to cover all the pipes and wires. The farthest out wire was at 42 inches. Taking a T-square and marker, I measured and marked the beams where this outermost point had to be.

Outermost point marked.

For the length of this whole bulkhead, I went from that pesky doorframe to the far wall we created for the bathroom. This wall had to stop at the height of the pipes at that point. This end was helpful because I could just stick all the boards going across on top of the wall and screw them to attach to the top of that, since they’d be hidden inside when it was done. The space between was 9 ft.

Those were the main measurements I had to work with. Time to cut wood!

Step 2: Create the front. Since I had to come down 13 inches, I wanted to attach 2x4s to hang down from each beam and create the front of the bulkhead. I decided to go up 5 inches to screw each 2×4 into each beam securely. So, I cut seven 2x4s to 18 inches each. I also took two 1x3s that would run across the fronts of these 2x4s at the top and bottom to help the future drywall attach and give a sturdy bottom edge.

Taking my 7 pieces, I marked them at the 5-inch point and also predrilled screws above that line to make it easier when screwing them into the beams.

Taking a small level, I found the mark on the beams I’d made before and marked a line 5 inches up. I did this on each beam across my space and marked on the left side of each, just to be consistent. Then, I took one piece at a time and held them against that line to keep them level as I screwed them into position.

Front pieces.

I waited on the 1x3s…because I forgot about them. But you could put these on now too. For the top, run the 1×3 right along the ceiling. Along the bottom, screw one end on so that the bottom of the 1×3 sits flush with the bottom of the 2×4 – you don’t want it sticking lower or it will be too low! Using a level, make sure the 1×3 covers all the bottoms of the 2x4s on the beams, then secure once level. I used drywall screws for these.

1x3s on front.

Front ready!

Step 3: Add a connector along the back wall. First I had to make a whole frame for that back wall, using 2x4s. If you already have a back wall, just find and mark your studs. I had the added wonkiness of the pipes going into that back wall, so my connector had to stop and start around those pipes to get all the way to that end.

Basically, I measured 13 inches down from the ceiling beams, just like with the front side. Along the back studs, I marked at 13 inches. (I also marked 1/2 inch down from this to know where the drywall should end…and this line completely screwed me up so that I put the connector on the wrong line and now the door doesn’t open all the way. 😖 Don’t do that.) I used a level and double-checked, and the line for my connector was level all the way across.

Connector line on back studs.

From there, it was easy to screw a 2×4 onto the back wall studs, making sure to keep the bottom on the marks I’d made at 13 inches down. (We’ll pretend I did that right, anyway.)

For the space on the back wall between the pipes, I took a shorter piece of 2×4 and also screwed that into the studs at 13 inches down.

Step 4: Create a middle beam. If your bulkhead doesn’t need to be that wide, you might be able to skip this middle support. But 42 inches wide is too far for drywall without a middle support.

This was a little tricky because I had to find a place at the door-end of the bulkhead where a 2×4 could fit and run all the way to the other end. I had to put mine up a ways, but I found a place to secure it to a stud on the wall over the door. I also used a little block of 2×4 to set it on as I screwed it in place.

Placing end of beam.

I purposefully had this board be 10 feet long to reach all the way to the wall at the other end, and it stuck over enough to sit on top of the wall there. Taking a level, I made sure the 2×4 was level from the door-end to the wall-end, and I propped the wall-end up on blocks that I screwed together. When I was sure it was level, I screwed the “beam” into the blocks.

Wall-end of beam.

For what came next, I really could have used a third arm…or asked for help. Taking a long level, I held it against the bottom of a front 2×4 and held it at level with one hand. With my other hand, I took a tape measure and measured from the top of my beam to where it met the level. This was 9 inches – after several tries to keep the level level.

So, like I’d done with the front, I needed little 2×4 pieces that hung down from that new beam. BUT, I needed to subtract the 3/4 inch that a 1×3 would run across the bottoms of the pieces. That meant my pieces needed to be 8.25 inches instead of 9.

I cut these little 2x4s, predrilled holes above the 3.5 point (the part where they’d connect to the 2×4 beam), and held them so that the top of each was flush with the top of my beam. The placement of these along the beam just depended on where I had space to fit my drill. I did make sure to keep them as evenly spaced as I could.

With those on, I was able to take another 1×3 and run it the length of this beam, screwing it into the bottoms of each little 2×4 hanging from the beam.

1×3 along bottom of beam.

Worth noting – I couldn’t get anything near the door-end for this beam. There just wasn’t a way to connect anything in the middle because of how the pipes curves. But because that was at the end – and I had the back connector there – I figured this would be good enough.

Step 5: Put up drywall. Start with the underside/ceiling of the bulkhead. For this part, I was finally smart and asked for help. 😆 First, measure to be sure of the size. We had 4×8 sheets of half-inch drywall, so we had to add a bit at the door-end, which I was fine with since that part was troublesome anyway. For width, we measured and cut the drywall with a utility knife to 42.75 inches, which allowed us to run the drywall all the way from the back wall to just cover that front 1×3.

Drywalling.

Using the brute strength of my two assistants, they lifted the drywall into place, making sure the back end was tight against my back wall connector while also tight against the wall-end. I was ready with the drill and drywall screws, and I started along the back wall connector, screwing up into the underside of that 2×4. At the other side, I screwed into the bottom of each 2×4 hanging from the front beam. For the middle, we could see where that 1×3 ran because of the gap where we hadn’t drywalled yet, so my taller husband quickly used my T-square and drew a line down the center of the drywall where the board would be. Then I screwed a few screws along that line to secure the middle of the drywall.

Once that first piece was on, we measured the remaining gap at the end and again lifted it into position – closing the door to make this easier – so I could screw it into the back connector and front boards. There was a little bit of the middle connector that still ran this far, so I screwed into that too.

(It was at this point that I realized my mistake with that back line, because the door wouldn’t open all the way. 🤦‍♀️ Do as I say, not as I do.)

For the front piece of drywall, this was obviously a much smaller piece. We again had to add a separate piece at the end where there was a gap, but our first piece was 8 feet long and 13.5 inches wide. This extra 1/2 inch ran down to cover the drywall of the underside, making a nice smooth look from the front.

The helpful thing to remember here is to use an uncut side of drywall at the bottom. This makes the bottom edge perfectly straight and clean, and you don’t need to add any kind of corner piece to make a nice corner.

Step 6: Cover screw holes and seams with drywall mud (joint compound). Make sure all your screws are sunk into the drywall just enough that they don’t stick up. If your seams are rough…hypothetically…you might need drywall tape and/or mesh to make them smooth(er).

Taking a little spreader tool, I applied mud over everything that needed it. I also added a bit (translation: a lot) to the underside part of the corner so that the bottom was a nice corner where it met the front drywall that was a nice, perfect edge.

That took a long time to dry because my mud had to be so thick, but giving it overnight usually is enough. (It depends on your joint compound directions too, of course.) Once it is dry, sand the mud smooth.

Drywall mud on and sanded.

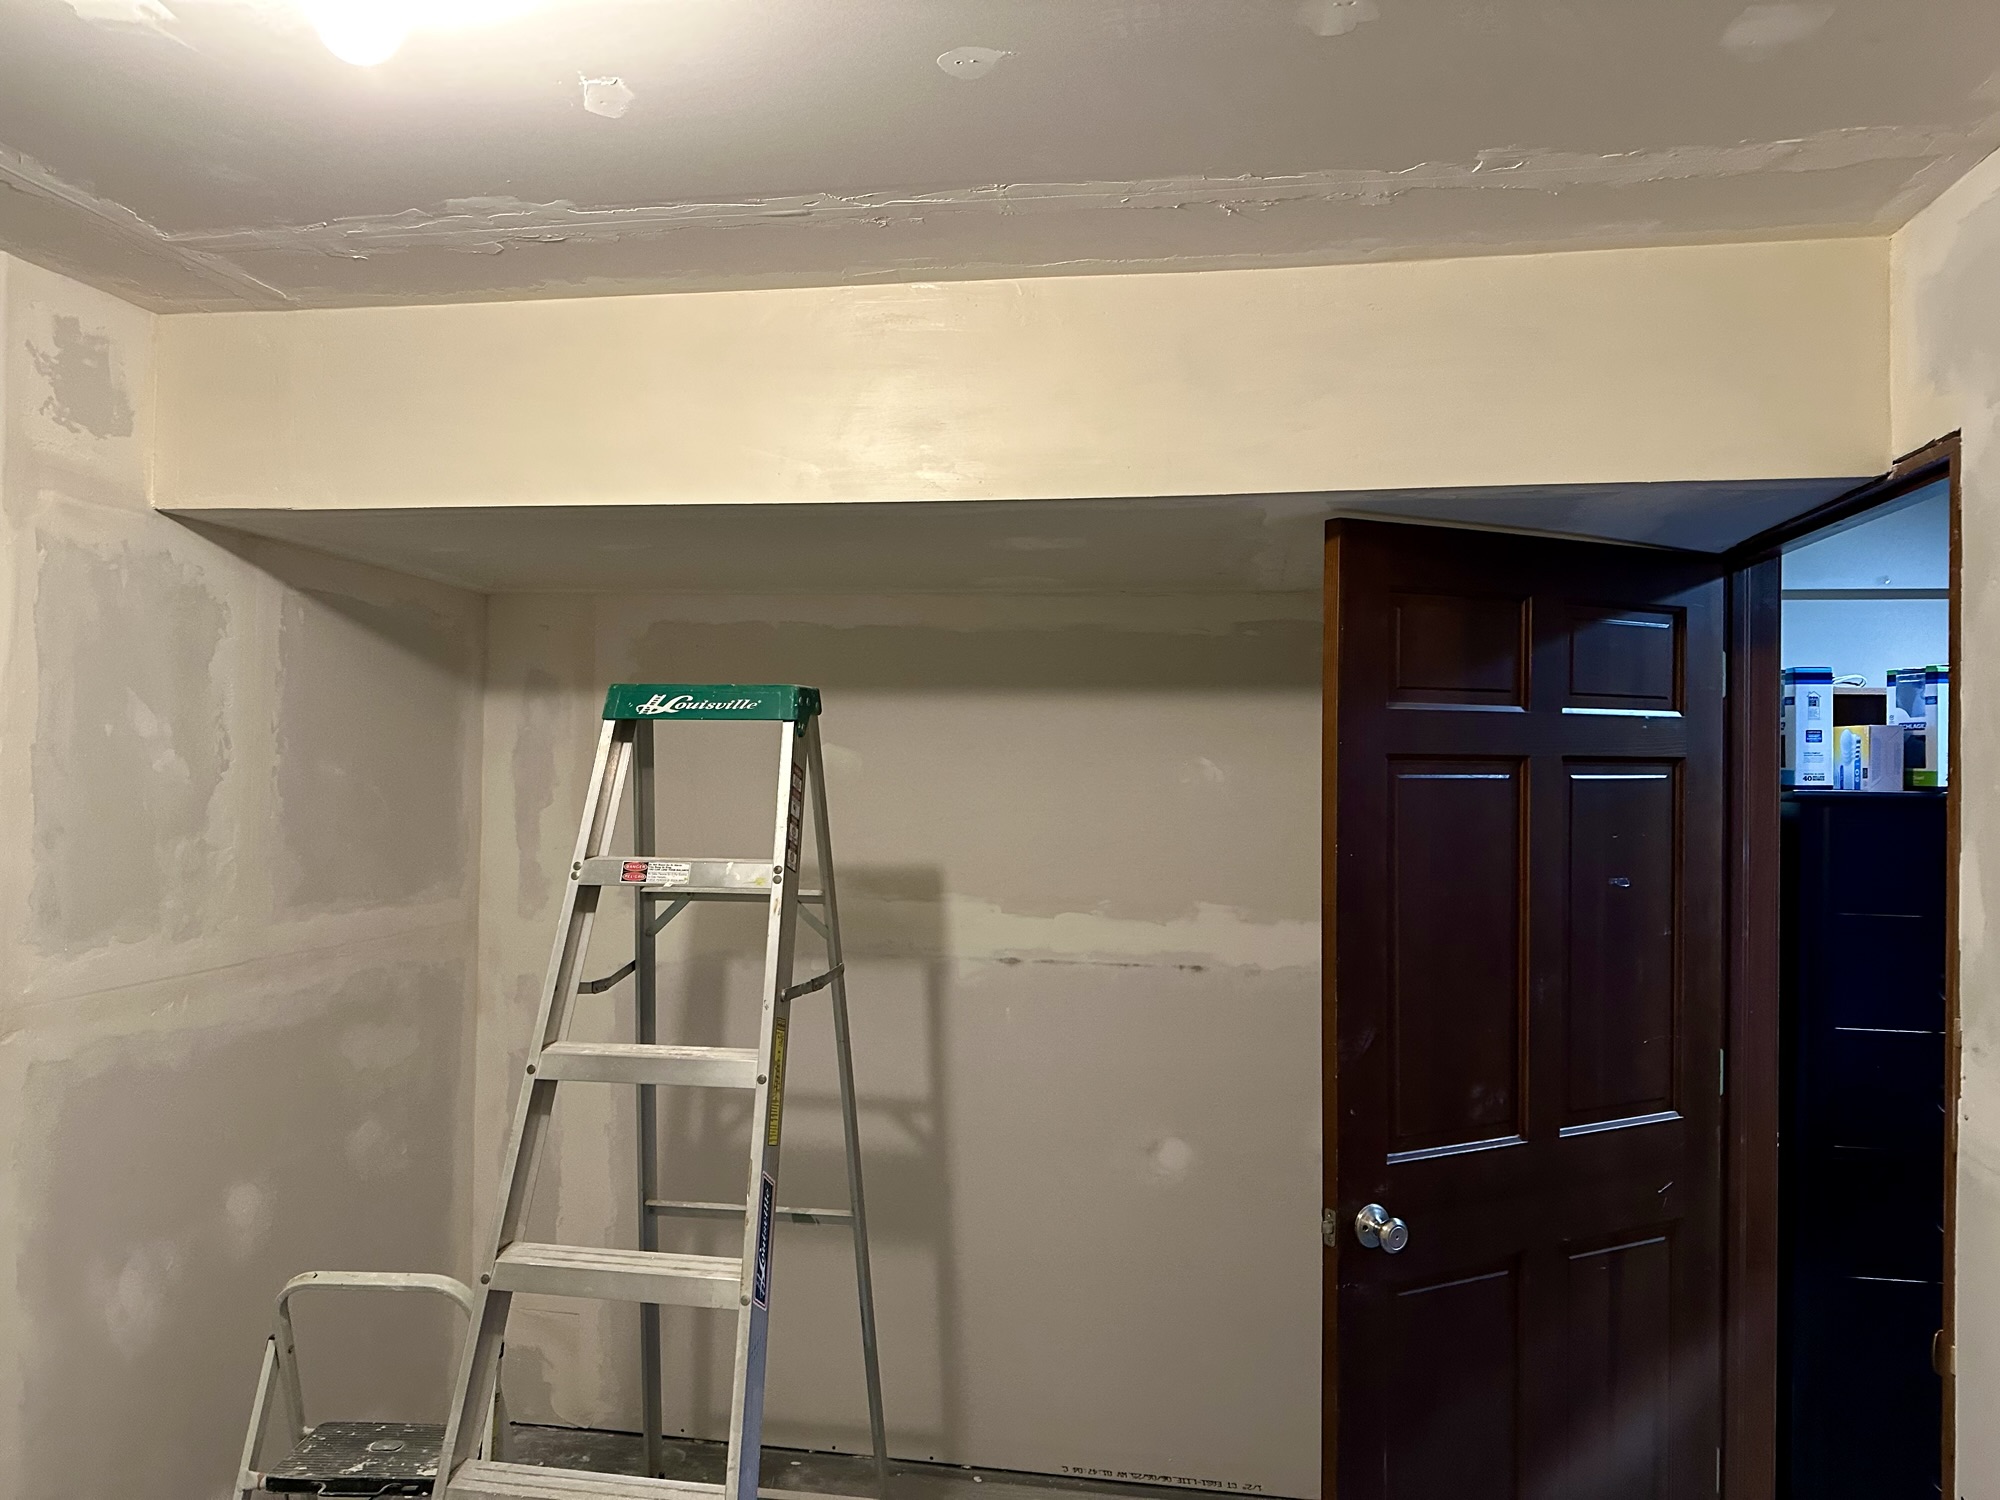
Step 7: Paint. With the bulkhead ready for this final step, all you have to do is pick your color and paint! I painted the bulkhead and was happy with how it turned out – it was certainly less of an eye sore that those angled pipes had been! – so I left the rest of the room for my husband’s cousins to finish.

AFTER: Bulkhead hiding it all!

You could paint the bulkhead a completely different color from the rest of the room if you want it to stand out, but I think they’re going to leave it the same color as the room since it’s a smaller room and this light color brightens things up.

…In hindsight, this wasn’t all that difficult, but it sure seemed like it while we were doing all the other work at the same time! (And before anyone asks, the door opens wider than pictured above.) 😆

Posted on Leave a comment

Fake Hardwood Stair Treads

Someday we plan to get carpet again for our upstairs bedrooms, hallway, and stairs. For now, however, we have a cat. If you’ve been following along for a while, you’ve seen at least a few projects of mine that came about out of necessity because we needed to get rid of old flooring. I will say, the cat has forced me to get creative. 😜

Around two years, ago, I pulled the carpet off our stairs because of 1) cat and 2) it was 22 years old and consequently quite gross even without the cat’s help. My temporary fix at the time was to paint the stairs white to match the trim work, but obviously white stairs were doomed to fail too. So, this week, I finally got around to making wood-colored treads to hide dirt, crumbs, dog hair, etc.

BEFORE: Gross old carpet.

If you live in a house built in the 90s, you should probably be prepared to not find real, nice wood treads and risers when pulling up carpet. Instead, my treads were like a porous, MDF kind of wood. Also, there was a gap on either end of the stair pieces because of how they left room for the house to settle – my gaps were huge! Like many things I’ve found in our house, the original builders did not have future remodeling in mind when they did what they did.

Anyway, because we do plan someday to put carpet back on the stairs, I didn’t want to shell out $30-80 per stair for real wood stair treads. I could’ve salvaged the existing risers and just put trim on the ends to cover those gaps, but even just buying wood to make my own treads without risers, that was a lot of $$$.

I have gotten weirdly good at making non-wooden things look like real wood, so I decided to give it a go with paint and stain I already had.

My cost for this final part of my stair fix was $0, but even counting the earlier supplies I’d needed 2 years ago, it was still under $200 for this whole stair makeover. That would have been the same amount as about 4-5 stairs if I’d bought treads. I have 14 stairs.

Supplies:

(As an advertising affiliate and Amazon Associate, I earn a small commission from qualifying purchases. But it doesn’t cost you anything extra and helps me keep up my site!)

  • Non-skid paint
  • Light brown paint, about a quart
  • Darker wood stain, less than a quart
  • Clear gloss polyurethane
  • InstaTrim
  • 1/8 inch plywood
  • Outside corner guard molding

Step 1: Remove carpet from stairs. This was gross and not fun, I won’t lie. But once I tore it all off and got all the little staples out, it immediately felt worth it. (No pictures of this step because it was a lot of my butt on camera. LOL.)

Step 2: Cover any landings. If you have a landing or two, you’ll want to cover them so it’s not just the rough subfloor. Our staircase has 2 landings, so I covered these with 1/8 inch plywood in a herringbone pattern like I’d done to our upstairs hallway floor. (So, if you need to know how to do herringbone, see that post “DIY Herringbone Floor in a Hallway.”) You could do just one big piece of plywood if you don’t want to bother with the herringbone, but I really like how they turned out.

For the stair-side of the landing, I used outside corner guard molding to cover the edge. I was initially worried about the slight lip this would create, but it turned out not to be an issue. To cover the other sides around my landing where there was existing trim work, I used InstaTrim to cover the edges. But, as I’ll explain below, hold off on the InstaTrim until you’re done painting and staining!

Step 3: InstaTrim. Again, do this step last! But since I’d pulled my carpet 2 years ago, I’d done this step already and so had to work with the InstaTrim already on – hence, you’ll see it in all the pictures. So, I might as well explain how I did it here.

My biggest problem was figuring out how to cover the gaps on the ends of my stairs, because they were not equally spaced and way too wide for any kind of caulk solution. The risers could’ve used normal quarter-round trim, but the treads had curved fronts where ordinary trim wouldn’t have worked. So, I found InstaTrim at a size that would cover the widest areas of my gaps.

Starting at the top of my stairs, I went down one side and then the other, sticking the InstaTrim all along the ends of the risers, across the ends of the treads, over the curved lips of the treads, and down onto the next riser again. It sticks on fairly well with its own adhesive, but I did add a few little nails here and there under the tread fronts to help hold the trim in place. I also had to start a new strip at one point, so I nailed those ends too.

InstaTrim covering gaps.

For a few of the absolutely enormous gaps, I also filled in along the InstaTrim with a bit of paintable caulk.

Once that was on, my end gaps were covered!

The InstaTrim is paintable, which was fortunate for me since mine was already down and I’d need to do touchups once I was done painting the treads and the landings. 🤦‍♀️ BUT if you wait to add this trim last, that would be way, way easier!!

Step 4: Paint the landings and treads and risers with non-skid paint. Because my stairs were made from very basic materials, I needed to prime the “wood” to make sure knots and other discolorations didn’t show through. I also wanted to make sure the stairs weren’t too slippery when painted. To solve this problem, I used a non-skid paint intended for stairs. It had a gritty texture to it which helped give the stairs a base layer that wasn’t slippery.

If you’ll need to use these stairs while you’re doing this project, it’s a good idea to do every other stair as you work from the top down. That way, you still have every other stair to use while the first set dries. Once those are dry and you can stand/sit on them again, you can go back up and paint the stairs you skipped.

Painting the stairs with this gritty paint was as far as I got two years ago. You can see from my picture below why I needed to do something other than just this white! 🤦‍♀️ So, I finally got onto the next step this week!

White with 2 years of wear.

Step 5: Paint a base, light brown. Like the step above, you may want to paint every other stair at a time if you need to use them while they dry. I fortunately had shipped my kids off to their Grammy’s for a few days, so I didn’t have anyone using the stairs all day. This meant that I could simply start at the top and do all of my stairs and landings as I painted my way down.

I originally thought I would make both the risers and treads look stained like wood, so I painted both in a light brown color. However, I ended up painting the risers white to lighten up the stairwell again (and it looked better with the trim work of the stairwell). If you KNOW you want your risers white, simply paint those white now instead of brown. Just be sure to use a fine brush to create a straight line where the risers and treads meet at the back of each stair. And if you’re doing white, be sure to paint in good lighting and do at least 2 coats.

For the treads and landings, I applied just one simple coat of the light brown. It doesn’t have to be perfect since the stain will cover and add “character” anyway to cover paint streaks or areas not covered as well.

Brown base painted on.

I let this dry for several hours. You want to make sure the brown paint adheres really well so it doesn’t wipe off with the next steps.

Step 6: Stain over the paint. I thought I’d use a silicone basting brush like I’d done before when making faux-wood beams and my faux-wood light fixture, but that would have taken forever. I decided instead to try just dipping gloved fingers into the stain and wiping it on with my hands, and that actually worked really well! You don’t want to do it too thick, just enough to add a kind of wood grain look over the light brown. It was also nice to use my fingers because I could get right up along the edges. (Yes, too close to the edges, but I knew I’d have to touch up and paint the risers white anyway. You could tape things off for cleaner lines.)

Stain on.

I suppose you could use a brush, but it really helps the “wood” to look natural if you can rub the stain on with your hand. A brush can look too uniform with strokes. Plus, it’s important that the stain gets rubbed into the paint to help it set. I also found that I could make nice, long wipes across the entire length of the treads to make it look like one, natural board of wood without broken up strokes.

I also made sure to wipe the stain around the curve of the tread fronts. I really rubbed it in here to cover the porous texture of the MDF.

Staining curved fronts.

For this staining step, I would definitely recommend doing every other stair if you’ll need your stairs. If you need to step on your landings, leave those until later as well. Long story short, I tried to do it all in one go like I’d done with the brown paint, but the stain needs a LONG time to dry.

If you’re staining the risers as well as the treads, you’ll want to do that as you stain every other stair as well – really, you could stain all the risers as you go, since you won’t be stepping on them while they dry anyway. The stain REALLY ends up covering imperfections like dents, staple holes, etc., so it would look very nice to do both the treads and the stairs. However, for my stairwell, it would have made everything too dark, so again that’s why I ended up painting my risers white.

Step 7: Wipe off excess stain. Once every other stair’s stain has been on for about 6-8 hours, you might be concerned if it hasn’t dried and is still sticky. No worries! Because you were smarter than me and did every other stair, you can take a rag to the top stained tread and wipe off as much extra/wet stain as you can. This actually helps it look even more like natural wood! Work your way down the stairs – standing on the unstained stairs – and wipe each tread and/or riser until you like the look of them.

Stained wiped to dry.

Step 8: Add a coat of polyurethane. You can do this immediately after the above step. I used a brush and took a quart of clear gloss polyurethane to my top tread. Easily and quickly, I brushed a good coat of poly over the stained tread. If you stained your risers, give them a coat of poly too. Work your way all the way down to the bottom stained stair, then let it dry for an hour or two – mine dried really fast.

It would seem that the polyurethane might make the stairs slippery, but the stain and that non-skid paint on the base layer add a lot of texture. In the end, all of this makes the stairs feel more like real wood, too.

Step 9: Finish every other stair and landings. Once the poly is dry, you can now step on these finished treads and go back to stain the treads and landings that you skipped before. So, repeat steps 6-8 for these treads and also any landings. When staining the landings, make sure to wipe one herringbone board at a time to keep them looking like their own pieces of wood. If you do one big board for your landings, just keep the strokes going all in one direction.

Herringbone stained.

Step 10: Touchups. Like I said, I changed my mind and painted my risers white once I had my treads and landings done. Obviously it would have been less work to paint them white before staining. BUT I also liked that I didn’t have to be too careful when staining along the back of my treads, since I knew I could make a nice clean line with my white paint in the end (I don’t always trust tape to give me good lines).

I also had to repaint my InstaTrim, but you should be able to spare yourself that. However, if you make goofs or change your mind about your risers as you go, know that it’s not too late to make fixes! One of the nice things about touching up once the poly is on is that paint wipes off of dried polyurethane pretty nicely with a wet wipe or damp cloth!

Step 11: InstaTrim. Like I said, it would be smart to save this step for last. This way, you don’t get any of your paint or stain on it! (See step 3 for how to attach it.) I will say that, for my landings, the InstaTrim was much easier to put on because I was only dealing with straight lines and no curves like with the treads.

Now my stairs are finally done! This was actually easier than I thought it would be…and should be even easier for you if you follow my instructions rather than guess as you go like I did. 😆

AFTER: Clean, fake hardwood stairs!
Done!

It’s been a few days now with my girls and dogs and husband using the stairs, and I’m happy to report they hide dirt and hair WAY better than my white stairs. Go figure. LOL.


DIY Must-Have Lists

Click to see more!
Click to see more!
Click to see more!
Posted on Leave a comment

DIY “Tiled” Textured Walls (aka, How to Hide Hideous Drywall)

If you saw my recent Instagram post about our bathroom remodel, you might’ve noticed how I fixed the ENORMOUS chunk of drywall I had to take out. As aggravating as that demo was, I’d thankfully already planned to make my own tile-looking textured walls. So, this plan kept me from freaking out too much when I tore that wall out and then had to patch in drywall and cover seams. (What lay behind this wall was such a mess… I did what I could. 🤦‍♀️)

Continue reading DIY “Tiled” Textured Walls (aka, How to Hide Hideous Drywall)
Posted on 1 Comment

“Meh” Nook Wall Upgrade

I can’t be trusted. If left sitting around, looking at our house for too long, I’m going to come up with a project whether we need it or not. I also put off doing overwhelming projects by diving into fun ones. So, this week while cuddling with my girls on our basement couch, glaring at our nearby bathroom which desperately needs demo, I naturally decided to upgrade our basement bar nook’s walls.

It helps that I already had all the supplies and didn’t have to spend any $$. But if you need to buy all the supplies, you can still do an entire room like this for under $100!

Continue reading “Meh” Nook Wall Upgrade
Posted on Leave a comment

How to Skip an Entry Rug

See that word “rug” in my title? Remember what our cat does to them? Here’s yet another house project that had to be completed due to Lucky having no respect for floor coverings. And I thought I was safe this time, people! We had a big entry mat that was rubbery and patterned with gaps and swirls, so there was no way that thing should’ve been inviting to pee on! But our cranky old man found a way to balance precariously and do his business anyway, ruining the laminate flooring underneath a little more every time.

Finally, I couldn’t take it anymore and was genuinely worried about our subfloor. So what to do? This is our main entry, so we had to put something there that would be friendly to wet and muddy shoes. Eventually we want to run nice wood flooring all through this main floor, but we’re not ready to cough up the $$$$ for that quite yet, plus I wanted something more durable for this entry point anyway.

Continue reading How to Skip an Entry Rug