This project was one of those little things that’s been an eyesore forever, and I finally found a way to make it pretty. Since I did an entryway bathroom door makeover (and still love it), I decided to use a similar look to cover our ugly, old doorbell chimes cover on the wall facing that door.

Supplies:
(As an advertising affiliate and Amazon Associate, I earn a small commission from qualifying purchases. But it doesn’t cost you anything extra and helps me keep up my site!)
- 1/8 inch plywood
- 1×1 wood scrap pieces
- 1x2s (optional)
- Small nails
- Stain or paint
- Command strips
- Fake greenery
Tools:
- Tape measure
- Miter saw or hacksaw
- Sandpaper
- Nail gun or hammer
- Paint brush
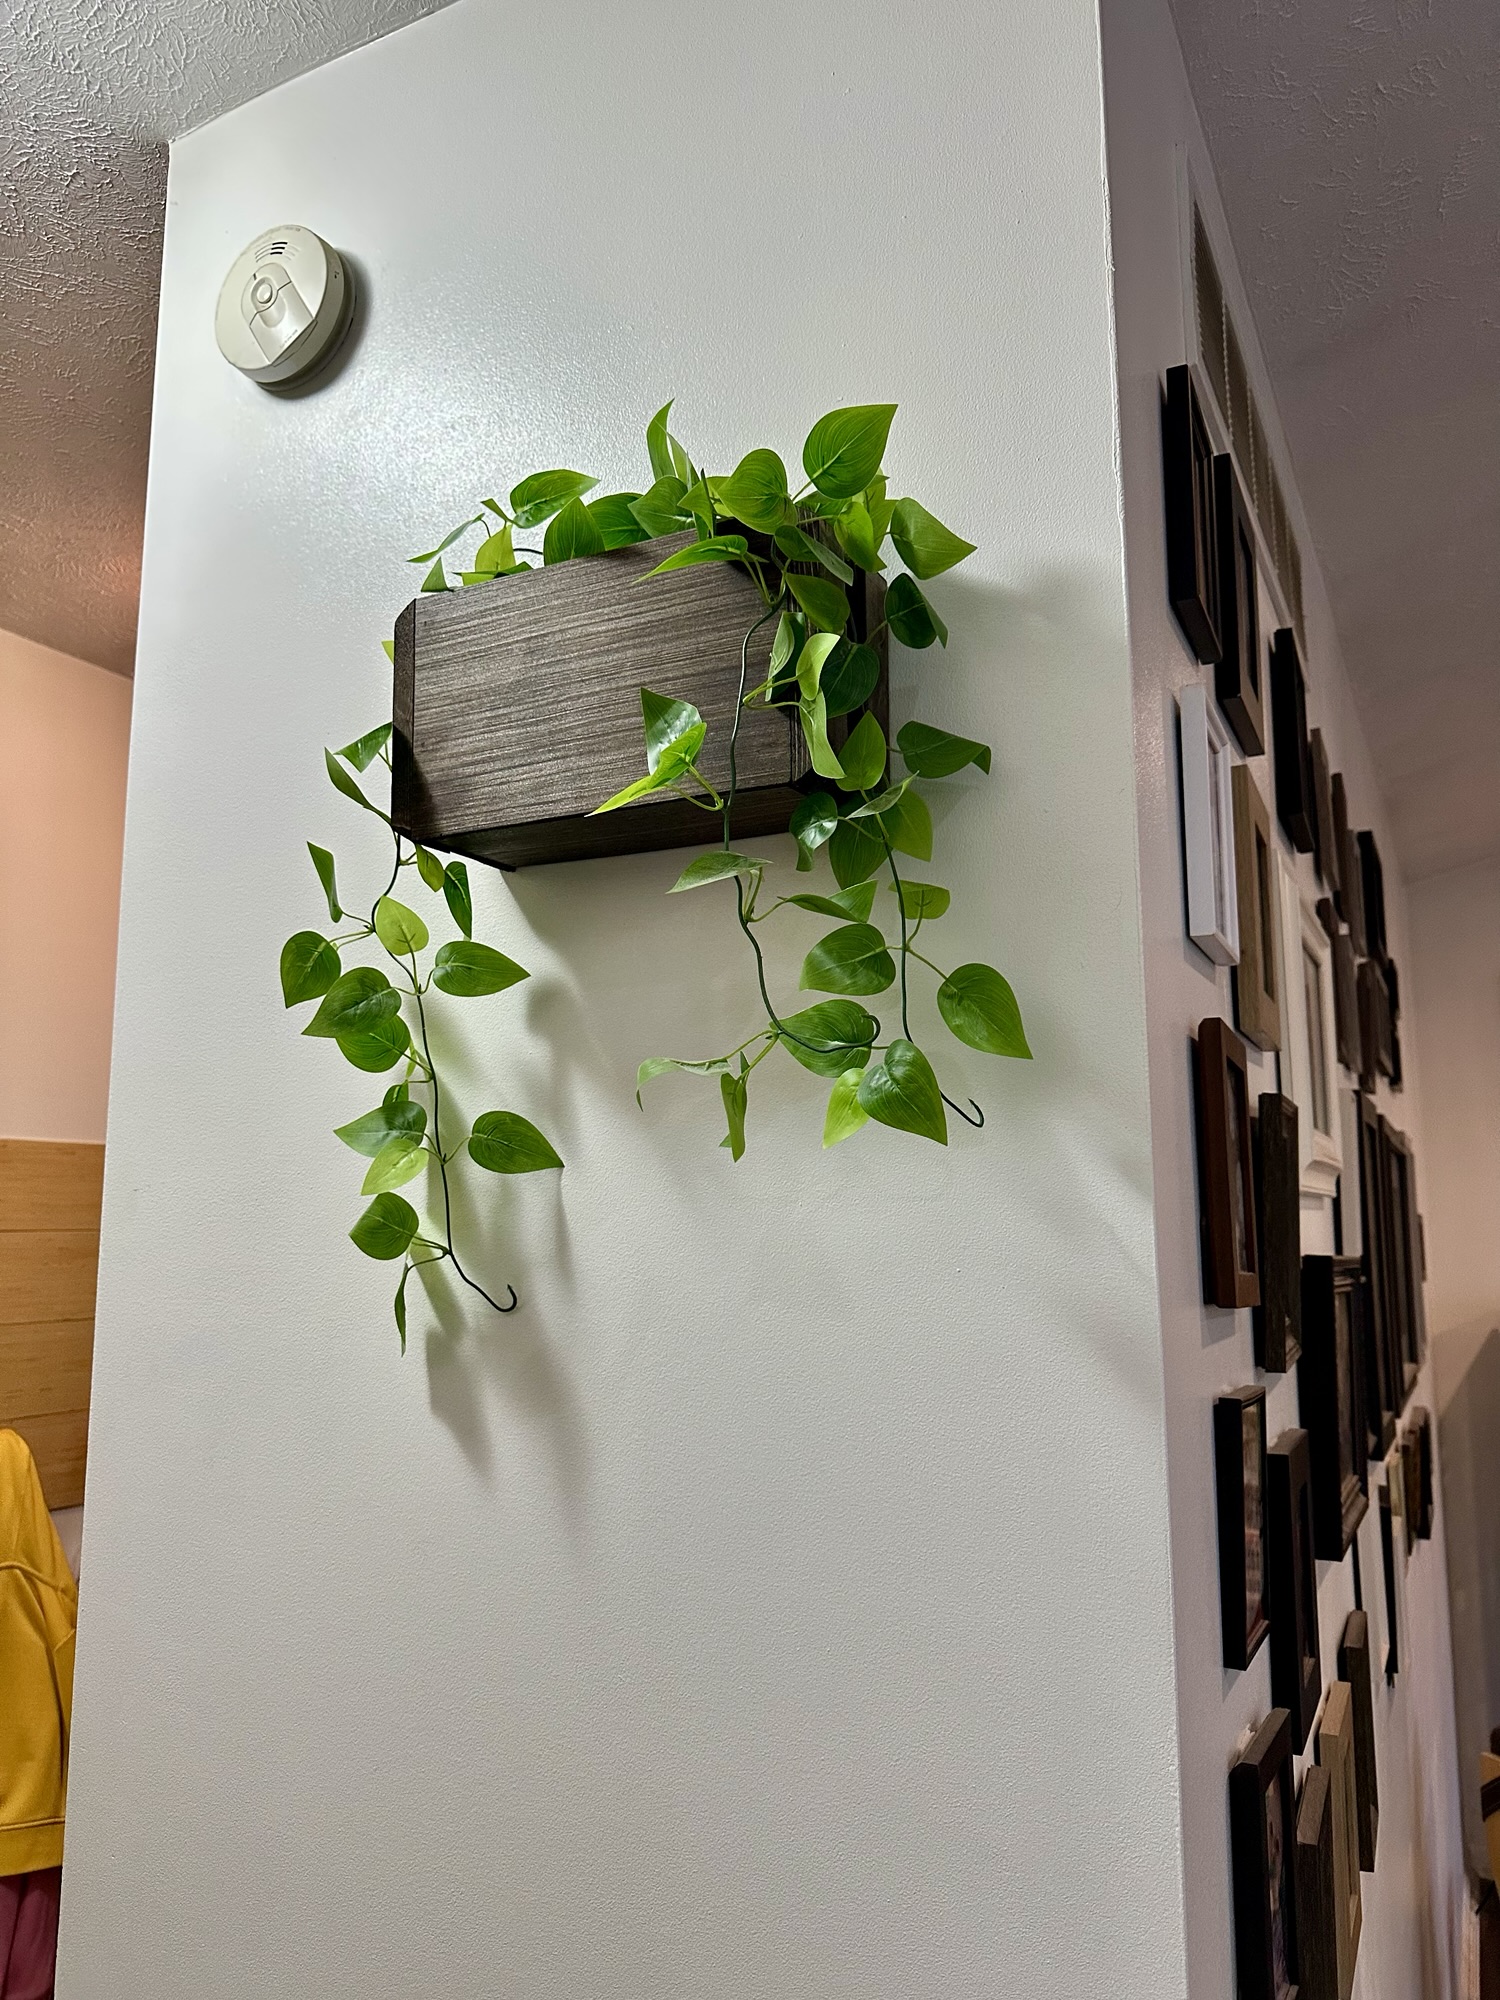
Step 1: Measure the spot and cut wood pieces. First, I measured the existing cover and decided to go with a new cover of 7×11. That would give me a little wiggle room for placement. I also needed to come out about 3 inches from the wall.

Using spare 1/8 inch plywood pieces, I cut a front piece at 7×11 using my miter saw. (This wood is thin enough that you could easily cut it with a hacksaw or other small saw.) Then I cut 2 side pieces at 3×7, and my bottom piece was 3×11.
To attach these pieces, I found some little 1×1 wood pieces and cut 4 to about 6 inches each. These go on the inside corners, so they don’t have to be perfectly even or pretty.
I sanded all of these pieces lightly to remove any rough parts.

Step 2: Assemble pieces. I used my brad nailer, but you could use little nails and a hammer or even wood glue, if you have more patience than I do.
First, I attached a side piece to one of the inside corner pieces. I made sure to line up the long edges so the side piece would cover the corner piece, but I didn’t want it to overlap because the front piece would do that, hiding the side piece from the front (see picture). I also made sure to leave a little room at what would be the bottom – this would let the bottom piece fit in place so the side piece would cover/hide the bottom edge. And, I left about an inch of space at the top so the corner piece wouldn’t be visible at all from the top.
Next, I took the front piece and also attached it to the first corner piece, making sure it lined up to cover the edge of the side piece. (Again, see the picture for a visual of how all this lined up. The picture is from the bottom, showing the little bit of room I left for the bottom piece.)

(You may note from the pictures that I used nails that were too long, but these were easy to bend back. Again, you’re not going to see the insides of this little box you’re making. So, if you don’t have small enough nails, no worries.)
With that one side and front piece on the first corner, I nailed on the other side piece and corner piece, lining them up the same way.
Next, the bottom piece was pretty easy because it fit right at the bottom of the 3-sided box I’d made. This bottom piece also helped me be sure everything was square, because I squeezed the front and side pieces to sit right tight against the corners of the bottom piece. One little nail at each end into the corner pieces was all it took to hold this bottom piece in place.

From there, I could easily add the last 2 corner pieces at the back of my open box. These I made sure to place flush behind the side pieces so they didn’t stick out. I nailed them into each side first, and then I used my bottom piece to again made sure everything was square. One little nail from the bottom piece into the ends of these corner pieces held them in place.
This created a “box” with an open top and back.

Step 3: (Optional) Add decorative parts. Just to add a little visual interest, I cut 4 pieces of 1×2 down to 7 inches, used my miter saw to create 30-degree cuts at the ends, and nailed them over the ends of my cover. This created some curves and made the whole thing look less “boxy,” plus it helped cover the nail holes and edges, making the whole cover look a little nicer. You don’t have to do this, but I liked it.

Step 4: Stain or paint. I debated between painting this cover green (like other accents in our living room) or staining it, but I ended up using the same dark walnut stain as the door nearby – the door that gave me inspiration in the first place. I’m glad I used this stain because the wood looks surprisingly nice stained, and the color looks great against the plants I used in the final step.
Step 5: Hang the cover. Because this cover is so light, I was able to just use command strips on the back of either end. I placed mine on the 1x2s along the back, but you could use the back corner pieces instead if you didn’t want to add the 1x2s.

After climbing on a stool to reach high enough, I did check to make sure the cover was level before pressing the command strips to stick on the wall on either side of the existing chimes cover.
Step 6: (Optional) Add greenery. You could leave the cover as it is – it looks nice alone as a wood cover. But, I really like how it looks after adding a few strands of fake greenery to hang out – it looks like a planter! I didn’t have to secure my fake plants at all because they tucked down around the existing chimes cover, and they hang down over the wood in a way that the leaves help hold it in place.

That was it! This looks so much better than the old, off-color doorbell chimes cover.

DIY Must-Have Lists


