Since I’m sure my children were in some way responsible for the destruction of my mom’s headboard, I was happy to find a way to bring it back to life. Following the same general idea for how I’d made my own headboard, I had her pick out a fabric that she liked, buy a roll of batting, and give me a little time. 😜

Supplies:
(As an advertising affiliate and Amazon Associate, I earn a small commission from qualifying purchases. But it doesn’t cost you anything extra and helps me keep up my site!)
- Old headboard
- Batting
- Sheet or other large fabric
- staples and staple gun
Step 1: Assess the damage. Depending on how bad your headboard is, you might need to clean it up, take off broken parts, and/or add some wood for framing the new headboard. I decided to only take off a few of the broken pieces, leaving the rest to help add a little stability. You will want something under all the batting – not just around the frame, but also in the center – so you could always nail on a few pieces of wood or something if you need your frame to be stronger.
The other really important thing is to make sure the parts that attach the headboard to the bed frame are still functional. My mom’s lower portion of the headboard – the leg parts that attach to the bed frame – were still fine, so I didn’t have to worry about that.
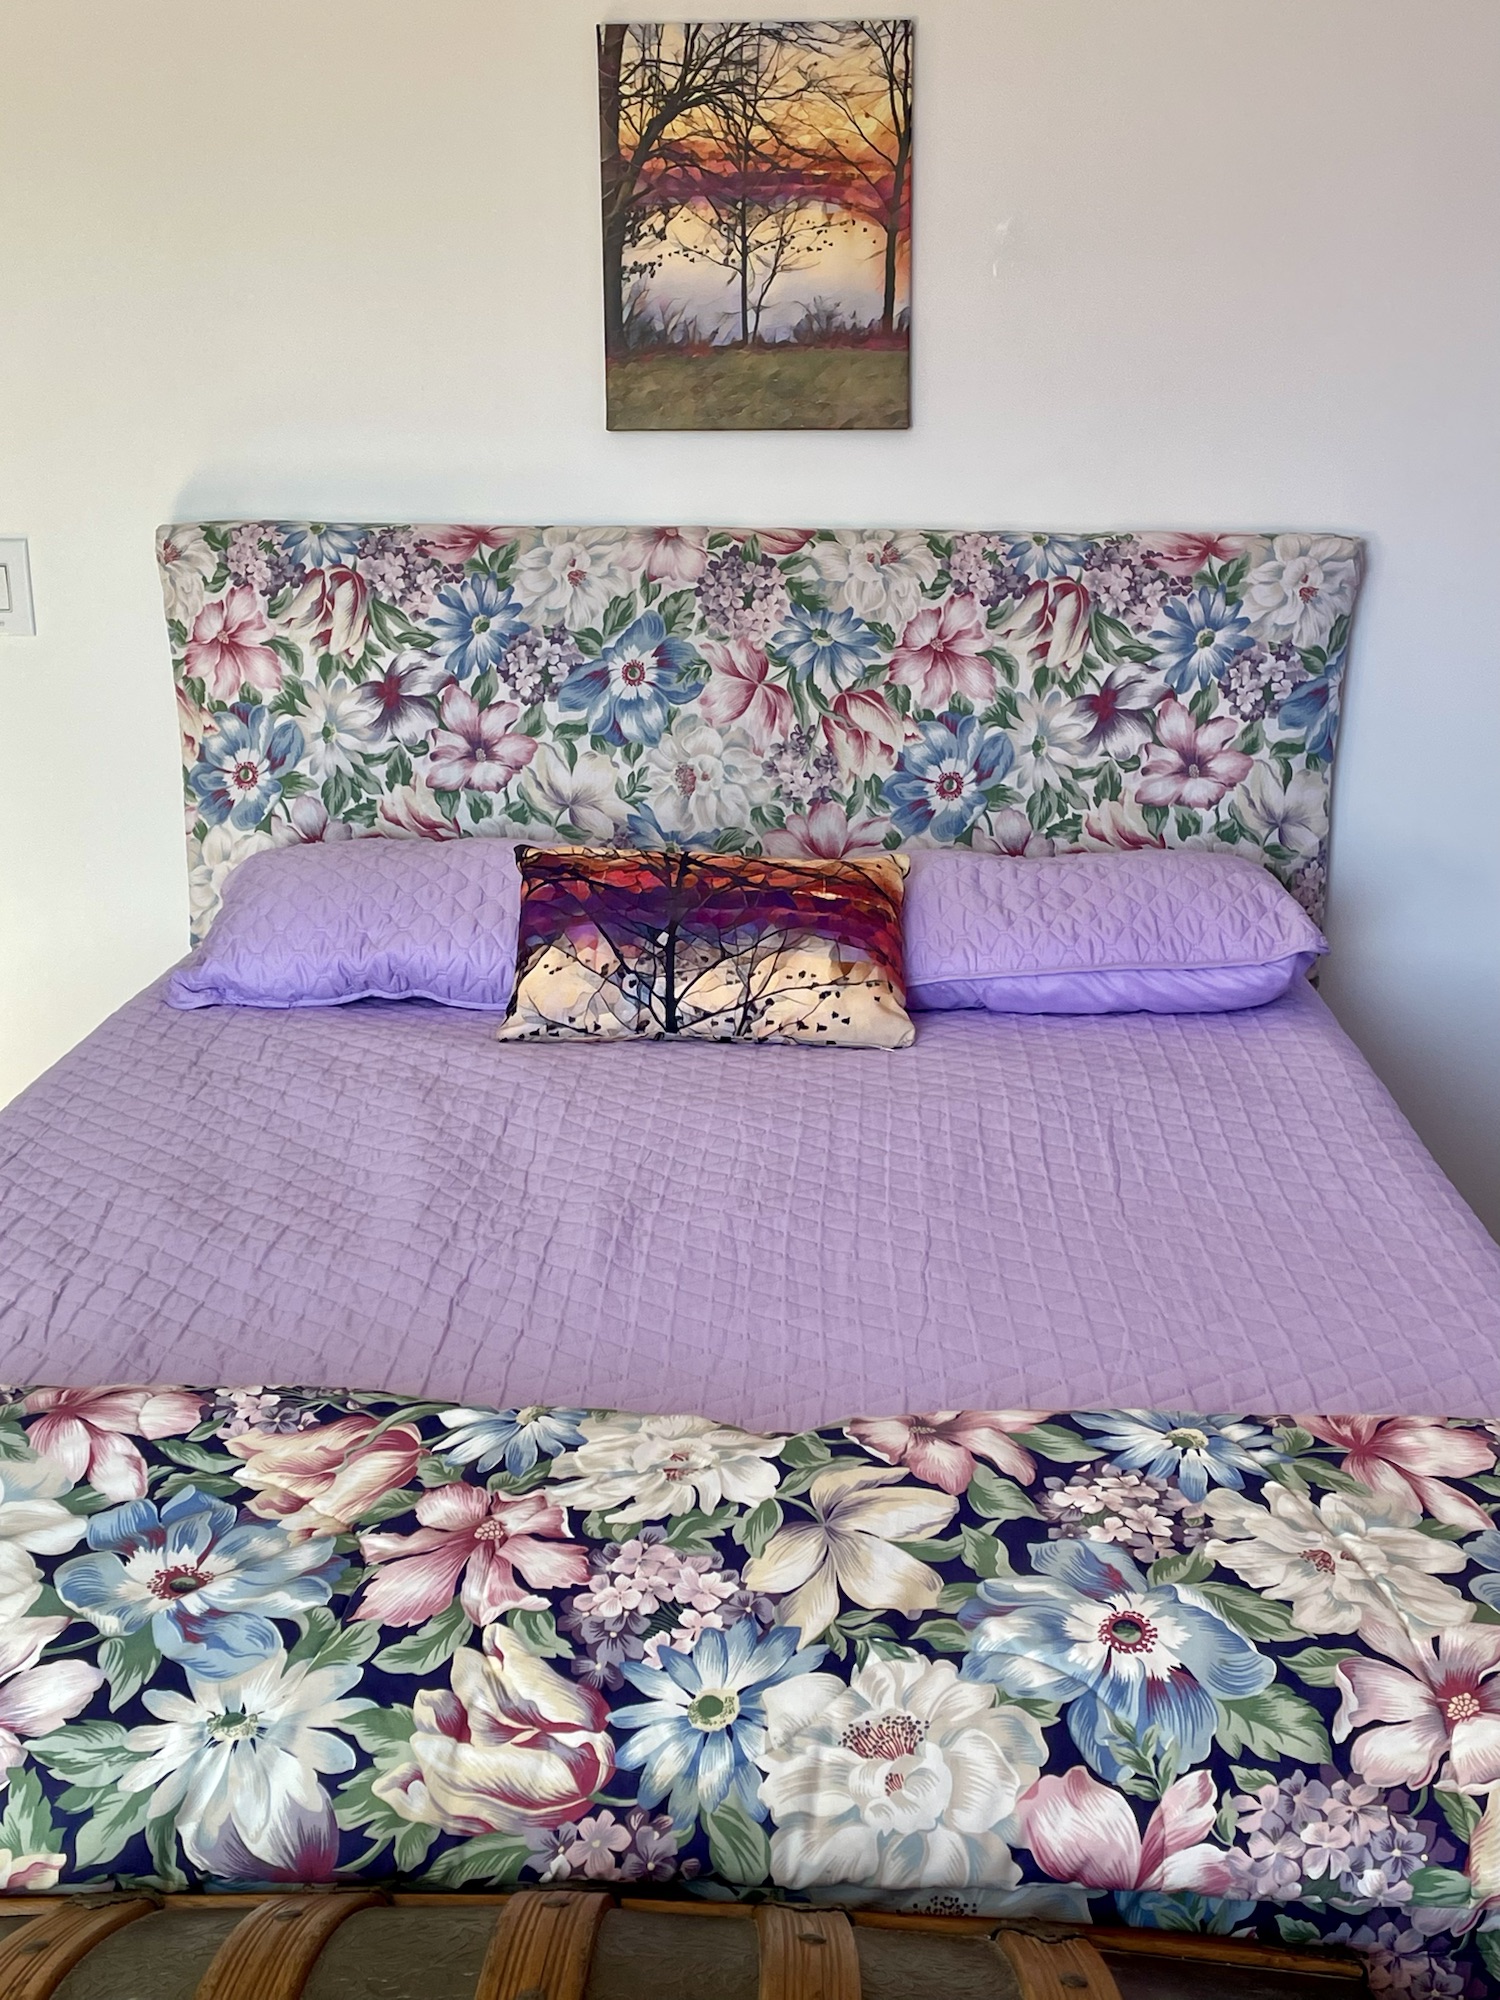
Step 2: Wrap the headboard with batting. I only needed one roll of this batting to completely cover the queen-sized headboard. Starting with the backside of the headboard facing me, I rolled the batting over the top of the headboard and tested out spacing for how I wanted to layer the batting and make it thick enough to soften the wooden frame. I decided to overlap the batting in the middle, making each side stick out about eight inches.

Once I had a plan, I took a staple gun and stapled the batting onto the BACKSIDE of the headboard all along the top. Again, I probably had about 8 inches that came down over the backside, same as at the sides.
With the top secured, I made sure to keep the batting fairly tight and straight as I pulled it around the side. Folding the batting around the corner kind of how you’d wrap a present, I stapled that corner down really well first. Then I went all down the side and stapled.

Where the headboard’s leg started, I simply folded the batting and kind of tucked it around, then stapled it on. This bottom end of the batting was still quite long, so I took scissors and cut along the bottom of the headboard, once again leaving about 8 inches of extra batting to wrap around the bottom. I again made sure to pull the batting straight and tight, and then I stapled all along the bottom to hold the batting in place.
I repeated this on the other side of the headboard, and the middle where the batting overlapped was nice and puffy.
Since I had enough, I took the rest of the batting, cut it in half, and wrapped this over each side of the attached batting where it was not overlapped yet. This gave all along the headboard an overlapped, double layer.

Step 3: Wrap the fabric. My mom had picked an old sheet that matched a blanket she still used on her bed, and this sheet was the perfect size. Folded in half, it was the perfect thickness for covering the batting too.
First, I turned around the whole headboard so that the front side was now showing as I worked. (It worked VERY well to lean the headboard against chairs, since I could move the chairs as I worked and stapled along the back.) I draped the folded sheet over the headboard and pulled it this way and that until I liked how it looked.

Next, I folded the sheet over the headboard and stapled the backside into the batting and the headboard. For the sides, I again folded the corners like you would a present, and I made sure that the front stayed nice and smooth before stapling the sides of the sheet into the backside as well.

Down at the bottom where the sheet had to kind of tuck around the leg, I pulled the sheet tight and stapled where the staples wouldn’t show, just in case this was ever visible.

I repeated all this folding and tucking at the other side, and that was it – the whole sheet was now smoothly covering the front of the headboard and nicely secured around the backside.

I’m glad I added those 8 inches all around, because this helps hide the backside from different angles if you’re standing along the side of the bed.
I’m really glad my mom picked a sheet that she liked, because it was the right size and also obviously gives her colors and patterns she already had in her bedroom.
Best of all, this project was a simple and quite inexpensive way to upcycle a headboard that otherwise would’ve been trash.

DIY Must-Have Lists


