Here’s my last DIY project for the year on the last day of 2023!
Once the charm of Christmas is over, I remember how much I dislike the early darkness of winter. (I can practically hear you people making jokes about my name, but trust me – I’ve heard it all. 😆) In my younger/single days, I often left up white Christmas lights all winter to make my living spaces more cozy despite the cold, dark nights. Now, I live with a husband and 2 small children who can’t remember to turn off a room’s “big lights” for anything. So, cozier light is harder to come by these days.
BUT, my girls do enjoy candlelight, and flameless, LED votive candles are a great, safe way to add touches of coziness scattered about where my family is least likely to leave on the house lights. Plus, I get the extra fun of figuring out cool holders for the candles…
Enter my second use for the pop bottles from my last project. I used the top halves of pop bottles to make Christmas bells, and now I found a use for the bottom halves – candle holders!

Supplies:
(As an advertising affiliate and Amazon Associate, I earn a small commission from qualifying purchases. But it doesn’t cost you anything extra and helps me keep up my site!)
- pop bottles, various sizes
- Flameless votive candles
- hot glue
- coarse sea salt
- faux moss
- gloss spray paint
- flower petals
- wine corks
- metallic gold paint pen
Step 1: Cut bottles in half. If you haven’t done my last project with the top parts of the bottles, then take new pop bottles, wash them, and cut them to whatever heights you like. I’d already cut mine a little lower than halfway down, so those were the sizes that I had to work with. But you could make them as tall as you like, or even cut them at an angle so that the “backs” of your candle holders will be tall with shorter “fronts” to show more light. Really, you can cut them any size or design you like!
To cut the bottles, I found it worked best to stab a knife in to make hole, then use scissors to cut around the bottle. Again, I made mine in as straight a line as I could…especially since I didn’t think of the angled idea until way after. LOL.

Step 2: Rim with hot glue. As you’ll see in the following options, there are a few ways I made candle holders. But for each option, I started by rimming the tops of the cut bottles with hot glue. This adds some texture, keeps the cut tops from being jagged or sharp, and makes a “melted glass” looking edge.

And now you pick how to finish!
Option 1: Paint the rims. For a few of the bottles that had flat bottoms, I simply used a paint marker and colored over the cooled/hardened hot glue. I used a metallic gold paint pen, and I like how shiny and pretty this made the rims, leaving the rest of the candle holder clear to see the brightest light.

I filled the base of the bottle/candle holder with a bit of coarse sea salt, partly to look pretty and partly to help the base be heavier. Setting a flameless votive candle in the center, these were done! You could fill your bottoms with different things for these candle holders, since this option leaves the insides most visible. I might change things up and replace the salt with pebbles at some point. Or beads. There are lots of options!
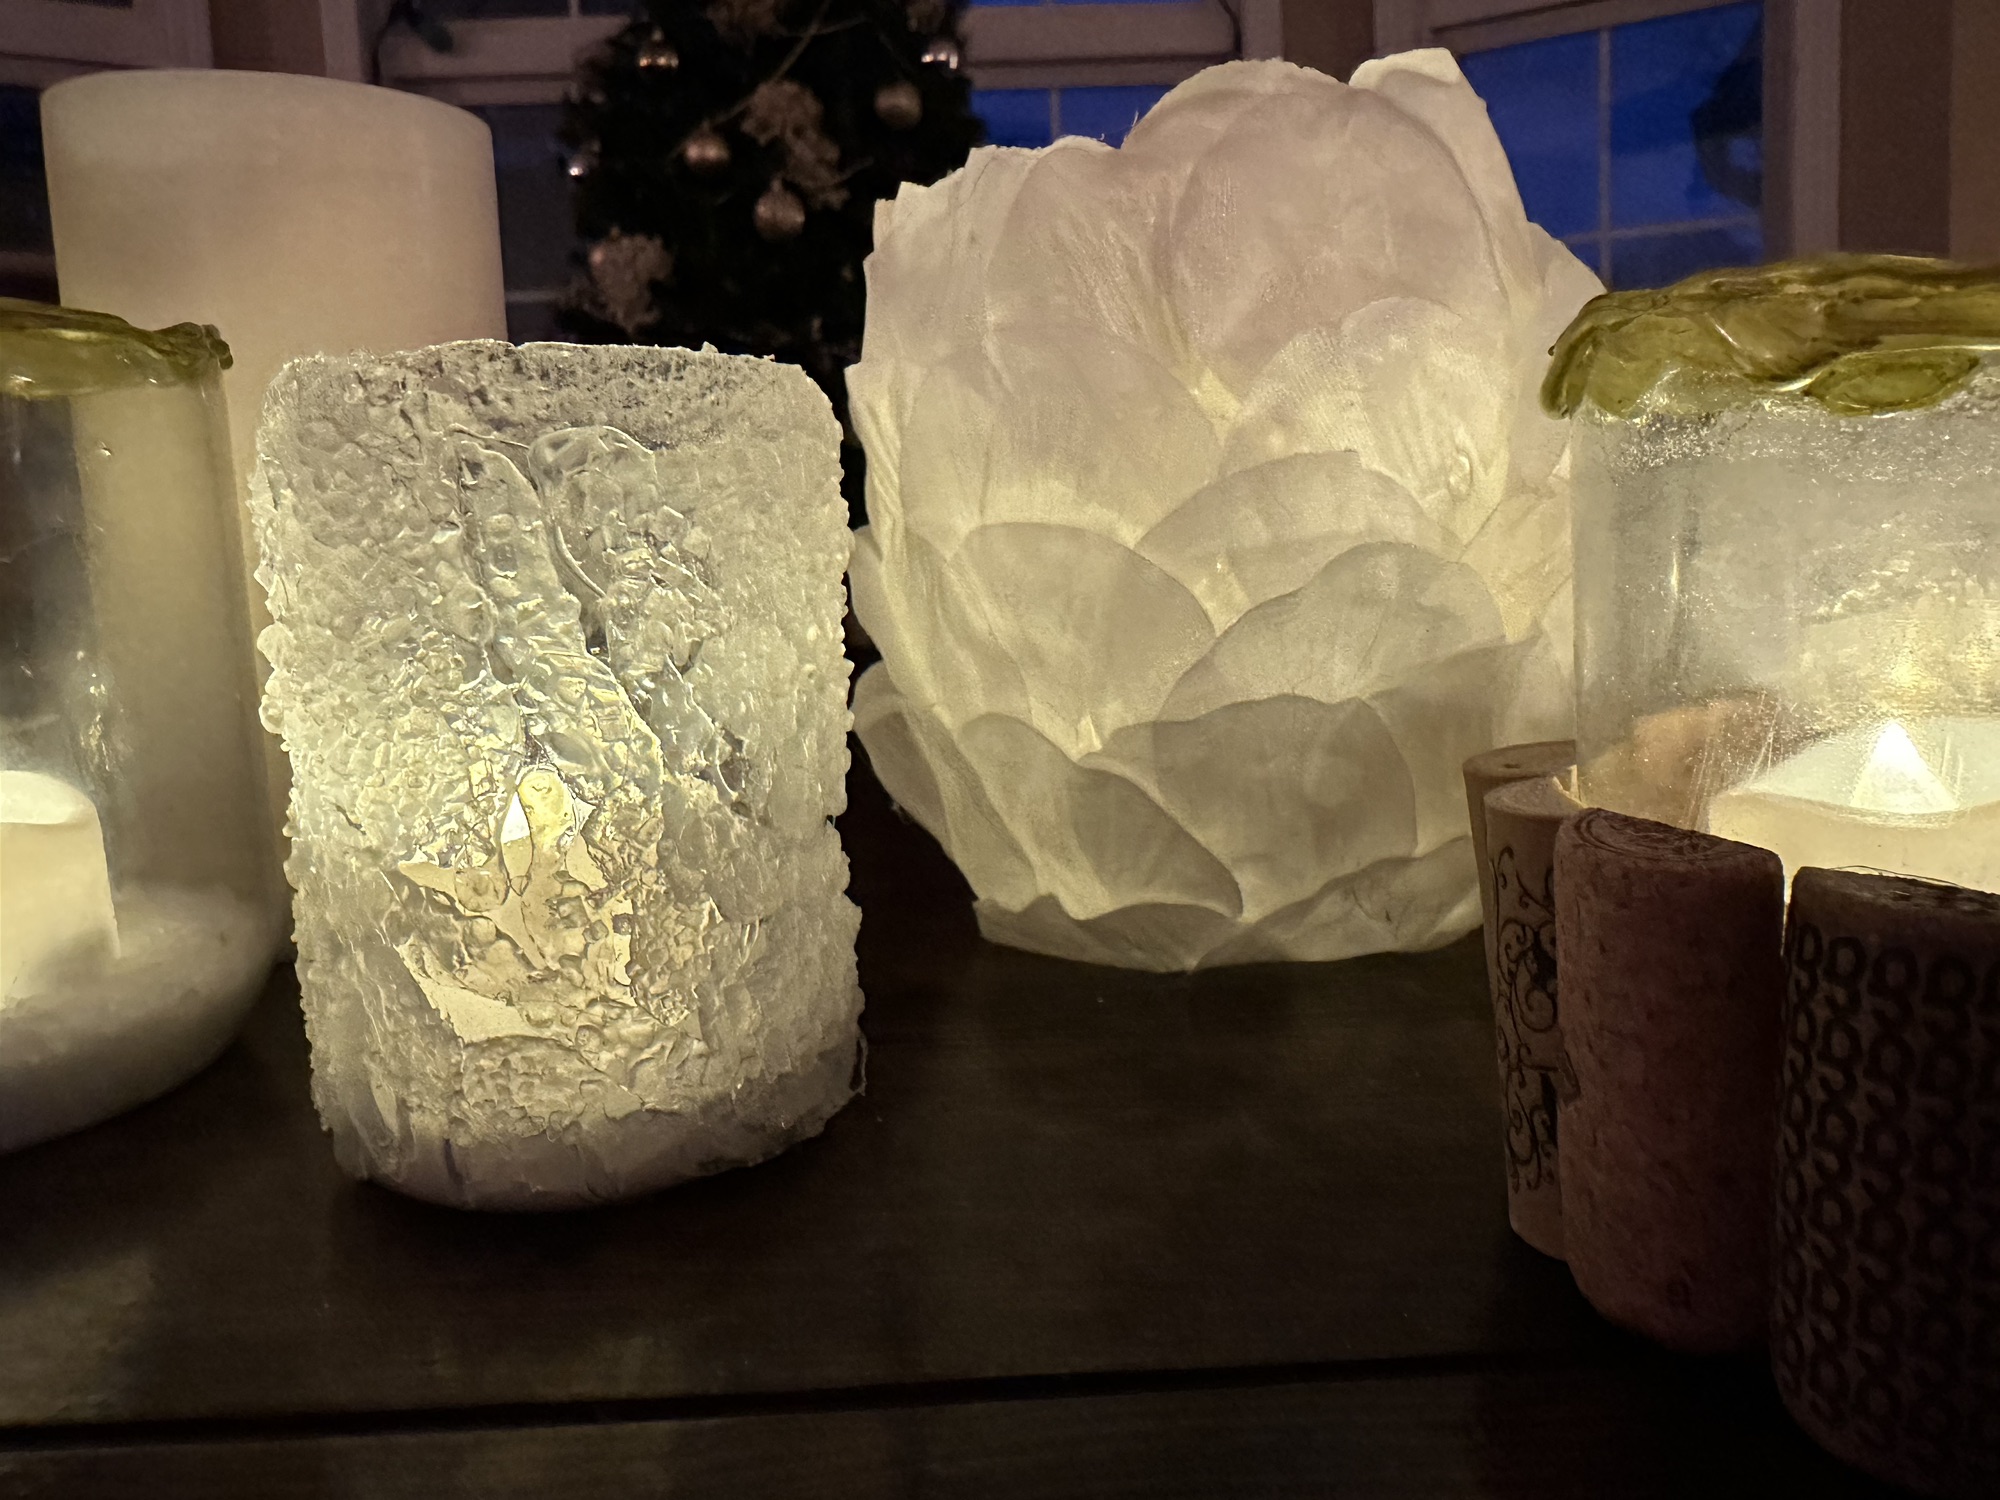
Option 2: Glue the sides and roll in salt. For other bottles with flat bottoms (these were SmartWater bottles), I spread hot glue on small sections at a time and then rolled that side over a plate covered with coarse sea salt. This used a lot of hot glue sticks, but honestly these surprised me in the end and were my favorite.

Once the salt was stuck all over (some gaps are fine), I took these candle holders down to my workshop and used a clear gloss spray to coat them. This helped hold the salt in place and also added a crystal-like shine to the salt.
With these dry, I took them back upstairs and again poured some sea salt into the base of each candle holder. (You can’t really see what’s inside these options, so the salt was fine just for adding weight.) Setting a flameless votive candle in the center, these were done too!
Option 3: Make a cork base. The bigger, 2-liter bottles had bottoms that were very obviously pop bottles, so I wanted to hide these bottoms a little better. One way I did this was by using wine corks left over from another project. First, I took a knife and cut them in half, lengthwise. Next, I used hot glue and spread it on each cut cork’s flat side, then pressed the cork against the bottom of the bottle. I did this all the way around the 2-liter base, using 17 halves of corks.

Because I only had enough corks left to do a smaller bottle, I did one of those the same way. (I guess we need to drink more wine 😆) But I like having a little variety between the sizes with the same style option, so these 2 together look nice. Once all the corks were on, I again poured in sea salt to add weight to the base. This especially helped on the 2-liter-sized candle holder, since the opening was bigger and you can really see what’s inside. I put more salt in this one than I had in the smaller candle holders, and it looked nice against the cork.
I ended up using my gold paint pen on the top, glued parts of these candle holders as well, just because I liked how that looked better than leaving them plain.

Option 4: Faux moss wrap. On another 2-liter bottom, I went around the top again with a thin bit of glue, then quickly dipped the top in salt. This rimmed the top with texture and a bit of sparkle. I didn’t need to spray these tops with gloss since there wasn’t much salt on there.
Next, I spread hot glue over small sections and pressed on faux moss to cover the bottle’s bottom. I decided to go all over with the moss, leaving only the top exposed where the salt/hot glue showed. This ended up looking woodsy and wintery, and it really looks better in person than in my pictures. I used green moss, but you could do this in different colored mosses too!

Again, I added some salt to the base for weight, then placed in a candle.
Option 5: Cover in petals. I’ve had these white flower petals for forever and finally had a use for them! Starting at the top of a 2-liter bottom, I put a dab of hot glue on the bottom of a petal and stuck it on so that the majority of the petal stuck up above the edge of the bottle. I continued to do this with petals all the way around the top, overlapping them a bit and gluing them down onto each other if they stuck out too much.

Once the top layer was on, I went around with a lower row of petals. Then I did another lower layer. Finally, I heavily glued on petals around the bottom.

This petal-covered candle holder already looked pretty, and once I got a votive candle inside… 😍 This one ended up being my second favorite. …I may need to scrounge up more petals and do more!
That was it! I like the variety I ended up with. They looked cool without candlelight inside, and I’m SO glad this plan worked out and they look even cooler with candlelight shining through! 😆


I’m sure there are many other things you could stick on the outside of these candle holders too! Beads, sequins, wood sticks – what else can you think of?
One IMPORTANT note: The hot glue might deform the plastic bottles a little bit if too hot. Since I was covering the bottles anyway, this wasn’t much of a problem. But it’s a good reminder that you MUST use flameless votive candles, because real fire will absolutely melt these and be a serious hazard.
I found flickering, LED votive candles on Amazon, and you can buy packs of them for pretty cheap…so I’m certainly making even more candle holders in the future. 😜
DIY Must-Have Lists


