Much to my surprise, my five-year-old held up her part of our deal to clean up after herself for over a month, and now she’s earned a room makeover. Her theme? “Under the Sea.” We have spent a good deal of time looking up very elaborate options, but my first project was easy enough to tackle before really diving in deep.
When she was a baby, we bought a few dressers from IKEA and stained them… By that, I mean my husband and father-in-law stained them without supervision, and now they are grey instead of white. Now, finally it was time to fix them up so they’re more little girl-friendly!

Supplies:
(As an advertising affiliate and Amazon Associate, I earn a small commission from qualifying purchases. But it doesn’t cost you anything extra and helps me keep up my site!)
- Old dresser
- Spray paints (I used 2 metallic spray paints and 2 flat spray paints)
- something round for tracing
- paint pens
Step 1: Clean and prep. I thought I might have to sand the dressers, but they still felt like they’d take paint just fine despite the stain. I did wipe them down pretty well just to make sure I wouldn’t be painting over any dust/gunk. Depending on the finish of your dresser, you may need to sand and/or remove old paint.
Step 2: Spray paint. I wanted the mermaid scales to look a bit iridescent, so I made sure my dark blue and dark purple were metallic spray paints for a sparkly finish. I also used a pink paint and a light green paint for undertones.
I wanted the colors to flow and look right as one “painting” over the whole dresser, so I left the drawers in the dresser as I spray painted.
Starting with the undertones, I sprayed on the green paint first, making sections here and there that I could blend with the other colors.

Then I did the pink over other sections.

For the dark blue, I again sprayed it on its own sections, but I also lightly went over the green to blend the two colors.

I did the same with the purple, going over the sections that remained and then also lightly going over the pink.

I did this for the top and sides of the dresser as well as the drawer fronts. I also then pulled the drawers out a little bit to spray a little color on the drawer edges.
That done, I let the paint dry. While staring at this dresser, I decided that I wanted the other, larger dresser to kind of match this one without being too matchy-matchy. So, I hauled out the drawers and spray painted the fronts of the drawers the same way I’d done the whole other dresser.

Step 3: Trace mermaid scales. After carrying the dresser and the drawers back to my daughter’s room, I tried to decide how big I wanted the scales to be. I settled on a coaster for my template, but you could use anything round that you can trace.
Starting at the top of the top drawer, I found the middle and held the coaster so that about half of it made the rounded bottom of my first scale. First, I marked on the coaster where each side started my tracing – this helped me be sure from then on that I was making the same size scales. I then traced this bottom portion of the coaster with a blue marker – which ended up being a lucky choice that gave me a cool end result. I went all along the top of that first drawer and made evenly placed “scales” for the first row.

Moving to beneath this first row, I lined up my coaster’s lines on the sides so that this next scale was centered under where the above two scales met. (Basically, stagger the scales.) Again, I traced scales all along this second row.
I repeated this all down my dresser drawers, continuing the scales on the bottom of one drawer onto the top of the lower drawer so it all flowed together.

I then did the top because my daughter wanted “scales all over!” Next came the sides of the dresser.

Step 4: Paint over the traced lines. Honestly, just the traced marker lines looked pretty cool, though they were a little too subtle for my daughter’s taste. So, I took a paint pen and traced over all my lines.
(I let the girls do the top of the dresser, although I was twitching and grimacing the whole time. 😬)

I used a pinkish-purple paint pen, and the blue marker lines bled into the paint to give it a really cool, shifting hue as I went. This was totally by accident, but it ended up looking pretty.

The nice thing about the paint pen I used was that I could wipe it away if I messed up, though I had to be quick before it dried. For the top that the girls worked on…Well, they’ll always be able to see where they helped. 😆

Step 5: Finishing touches. You could alternate painting the lines in different colors to give a more varied look, but I liked how mine turned out. I worried that I would need to put a clear coat of polyurethane over the dresser to protect the scales from scratching off, but I’d been right that the paint adhered to the stained (or semi-stained, let’s be honest) finish on the wood. IF you need a clear coat, now’s the time.
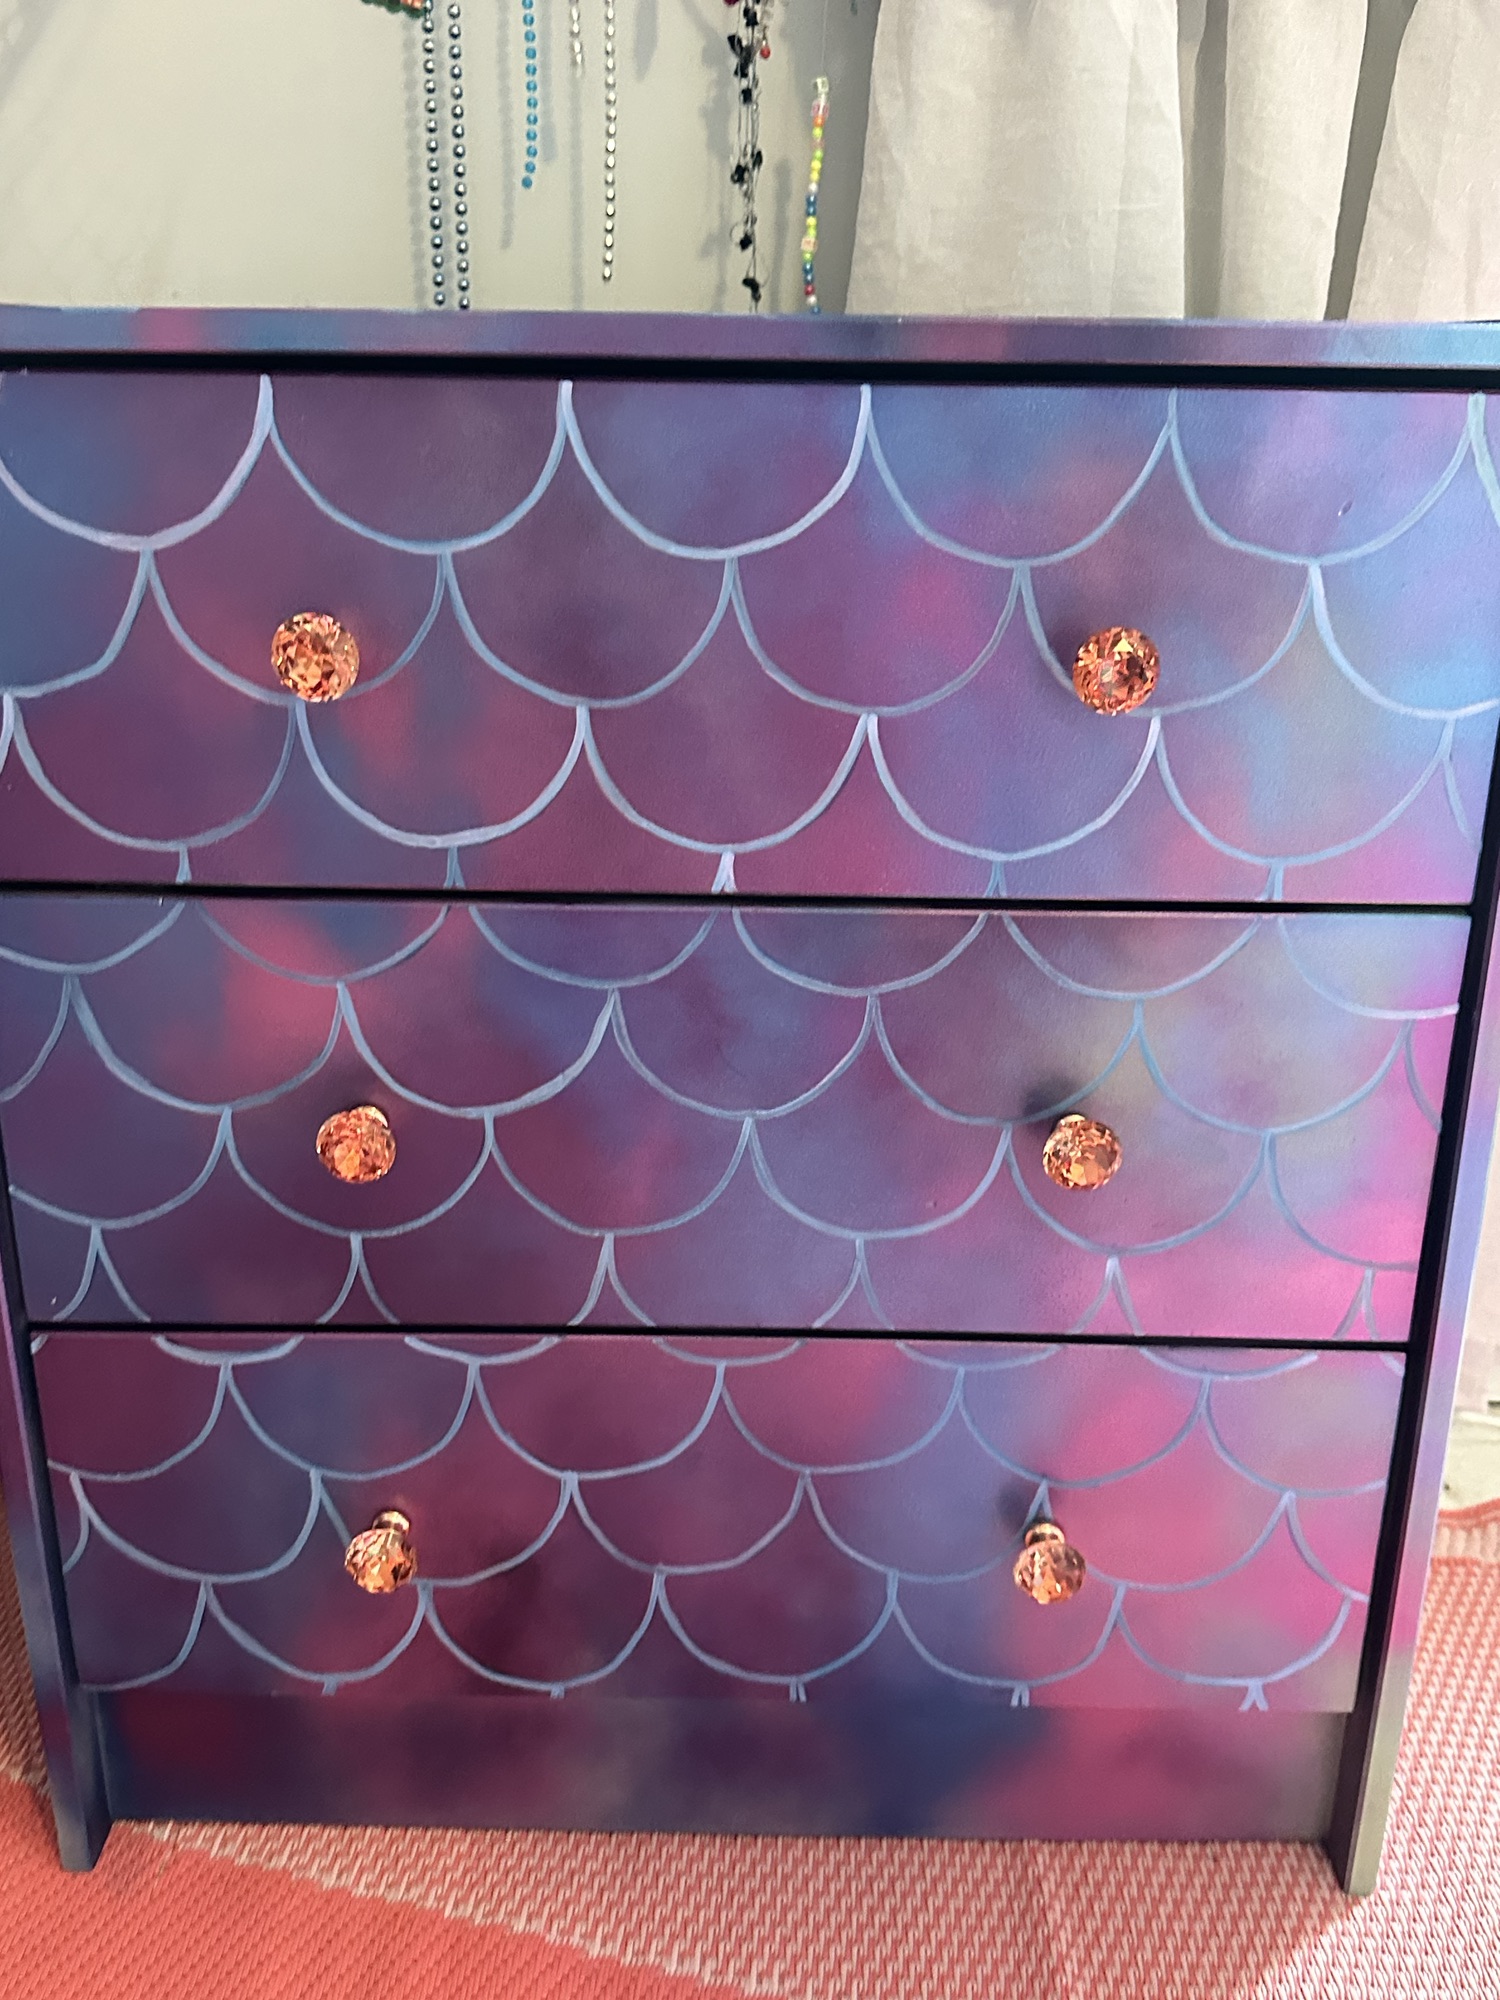
Deciding I was done, my daughter and I put on the shiny little drawer pulls, and that was it!

For the big dresser with the painted drawer fronts, we added these same drawer pulls as well. I agreed with her that putting scales on these drawers would have been too much, but the two dressers tie together nicely without being overwhelmingly mermaid-y.

Now I just have to figure out what “Under the Sea” mural to paint on one wall. And how to build an underwater cave. And how to make a sunken pirate ship bed. Wish me luck! 😜
DIY Must-Have Lists